Mình đã giới thiệu với các bạn về Hystrix và Hystrix Dashboard để monitor việc calling đến các service khác của một service trong hệ thống Microservices. Một vấn đề đặt ra là: chúng ta có rất nhiều service trong một hệ thống Microservices, chẳng lẽ chúng ta phải mở Hystrix Dashboard của từng service để monitor chúng? Sẽ tiện lợi hơn nếu chúng ta có thể combine Hystrix Dashboard của tất cả service vào trong một Dashboard và chỉ cần monitor Hystrix Dashboard này. Rất may là chúng ta có thể làm điều này với việc sử dụng Turbine hoặc Turbine Stream của Netflix và các wrapper của chúng từ Spring Cloud Netflix. Cụ thể như thế nào? Chúng ta hãy cùng nhau tìm hiểu trước về Turbine Stream trong bài viết này các bạn nhé!
Để làm ví dụ cho bài viết này, mình sẽ tạo 3 service với 1 service có 1 request URL sẽ được gọi từ 2 service kia.
Cụ thể như sau:
Service 1 expose request URL “/hello”:
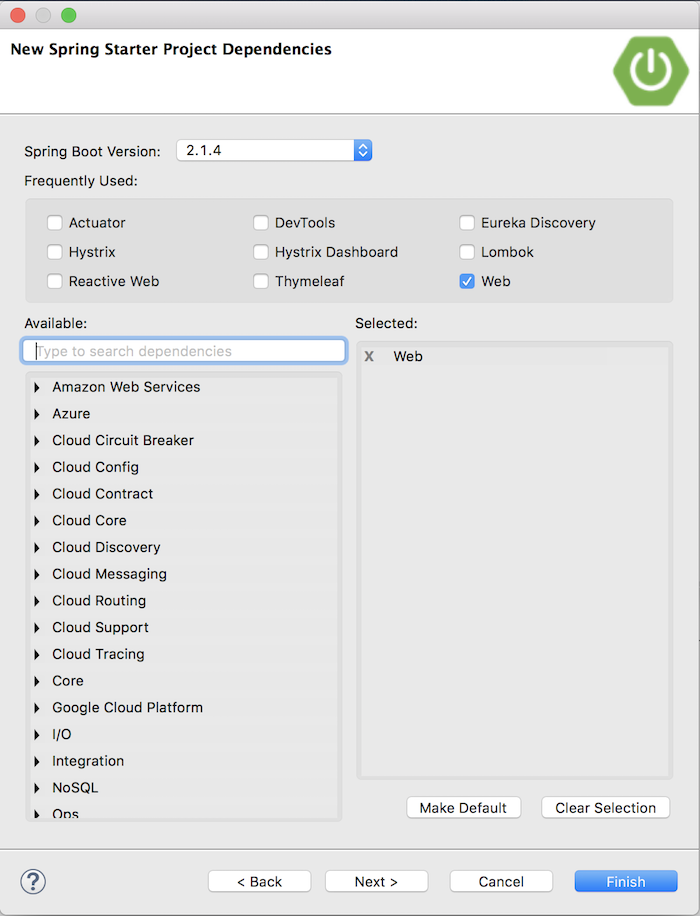
Chúng ta chỉ cần sử dụng Web dependency cho service này. Controller expose request URL “/hello” có nội dung như sau:
|
1 2 3 4 5 6 7 8 9 10 11 12 13 14 |
package com.huongdanjava.springcloudturbinestreamservice1; import org.springframework.web.bind.annotation.GetMapping; import org.springframework.web.bind.annotation.RestController; @RestController public class Service1Controller { @GetMapping("/hello") public String hello() { return "Hello !!!"; } } |
application.properties:
|
1 |
server.port=8082 |
2 service gọi tới service 1 ở trên sẽ sử dụng Web, Hystrix, Actuator như sau:
Service 2:

Service2Controller:
|
1 2 3 4 5 6 7 8 9 10 11 12 13 14 15 16 17 18 19 20 21 22 |
package com.huongdanjava.springcloudturbinestreamservice2; import org.springframework.web.bind.annotation.GetMapping; import org.springframework.web.bind.annotation.RestController; import org.springframework.web.client.RestTemplate; import com.netflix.hystrix.contrib.javanica.annotation.HystrixCommand; @RestController public class Service2Controller { @GetMapping("/service2-call-hello") @HystrixCommand(fallbackMethod = "defaultCallHello") public String service2CallHello() { return new RestTemplate().getForObject("http://localhost:8082/hello", String.class); } public String defaultCallHello() { return "Hello from service 2!!!"; } } |
SpringCloudTurbineService2Application:
|
1 2 3 4 5 6 7 8 9 10 11 12 13 14 15 |
package com.huongdanjava.springcloudturbinestreamservice2; import org.springframework.boot.SpringApplication; import org.springframework.boot.autoconfigure.SpringBootApplication; import org.springframework.cloud.client.circuitbreaker.EnableCircuitBreaker; @SpringBootApplication @EnableCircuitBreaker public class SpringCloudTurbineStreamService2Application { public static void main(String[] args) { SpringApplication.run(SpringCloudTurbineStreamService2Application.class, args); } } |
application.properties:
|
1 2 3 |
server.port=8083 management.endpoints.web.exposure.include=* |
Service 3

Service3Controller:
|
1 2 3 4 5 6 7 8 9 10 11 12 13 14 15 16 17 18 19 20 21 22 |
package com.huongdanjava.springcloudturbinestreamservice3; import org.springframework.web.bind.annotation.GetMapping; import org.springframework.web.bind.annotation.RestController; import org.springframework.web.client.RestTemplate; import com.netflix.hystrix.contrib.javanica.annotation.HystrixCommand; @RestController public class Service3Controller { @GetMapping("/service3-call-hello") @HystrixCommand(fallbackMethod = "defaultCallHello") public String service3CallHello() { return new RestTemplate().getForObject("http://localhost:8082/hello", String.class); } public String defaultCallHello() { return "Hello from service 3!!!"; } } |
SpringCloudTurbineService3Application:
|
1 2 3 4 5 6 7 8 9 10 11 12 13 14 15 |
package com.huongdanjava.springcloudturbinestreamservice3; import org.springframework.boot.SpringApplication; import org.springframework.boot.autoconfigure.SpringBootApplication; import org.springframework.cloud.client.circuitbreaker.EnableCircuitBreaker; @SpringBootApplication @EnableCircuitBreaker public class SpringCloudTurbineStreamService3Application { public static void main(String[] args) { SpringApplication.run(SpringCloudTurbineStreamService3Application.class, args); } } |
application.properties:
|
1 2 3 |
server.port=8084 management.endpoints.web.exposure.include=* |
Như các bạn thấy, cả 2 service 2 và 3 đều gọi tới request URL “/hello” của service 1 và tất cả chúng đều được enable hỗ trợ Circuit Breaker.
Tiếp theo, mình sẽ tạo một project riêng đóng vai trò là một Hystrix Dashboard, nếu không có Turbine các bạn chỉ có thể monitor 1 service tại một thời điểm:
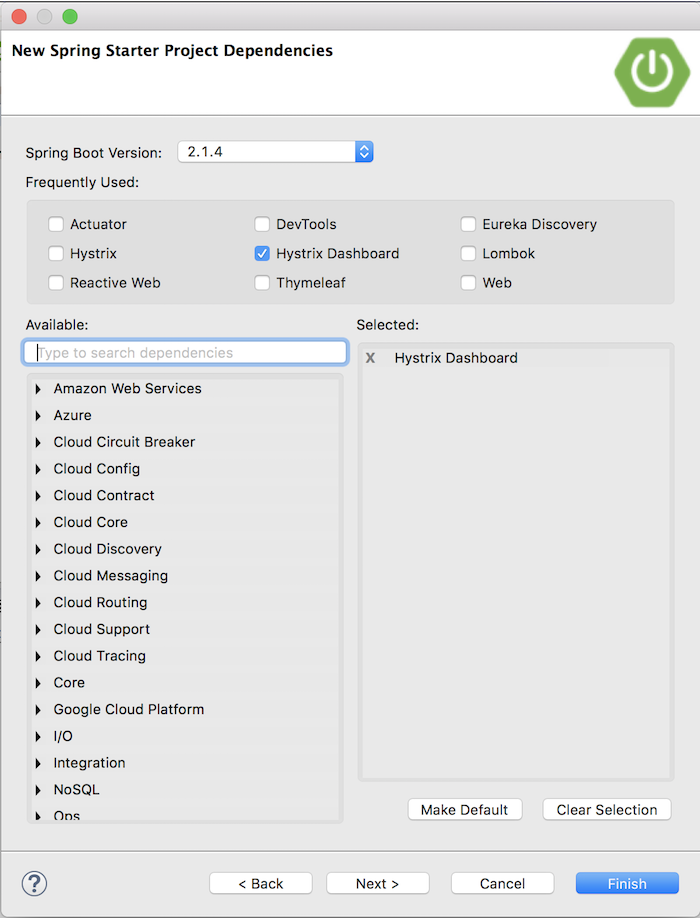
SpringCloudTurbineHystrixDashboardApplication:
|
1 2 3 4 5 6 7 8 9 10 11 12 13 14 15 |
package com.huongdanjava.springcloudturbinestreamhystrixdashboard; import org.springframework.boot.SpringApplication; import org.springframework.boot.autoconfigure.SpringBootApplication; import org.springframework.cloud.netflix.hystrix.dashboard.EnableHystrixDashboard; @SpringBootApplication @EnableHystrixDashboard public class SpringCloudTurbineStreamHystrixDashboardApplication { public static void main(String[] args) { SpringApplication.run(SpringCloudTurbineStreamHystrixDashboardApplication.class, args); } } |
application.properties:
|
1 |
server.port=8081 |
Bây giờ nếu các bạn chạy tất cả các ứng dụng:
Request tới Hystrix Dashboard:
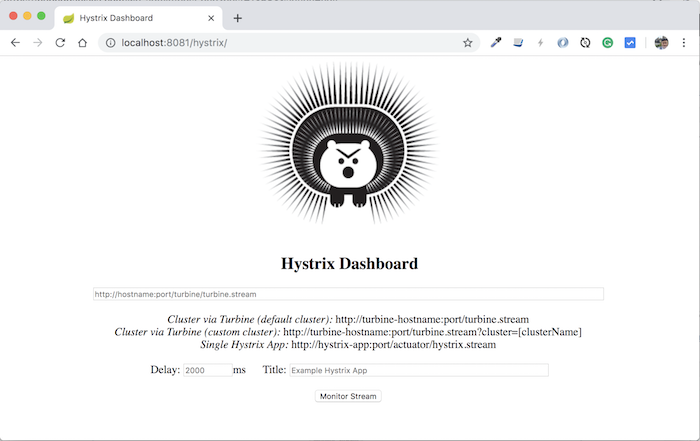
Nhập Hystrix Stream URL của service 2 hoặc service 3 cũng được, sau đó nhấn Monitor Stream.
Rồi request tới URL http://localhost:8083/service2-call-hello hoặc http://localhost:8084/service3-call-hello, các bạn sẽ thấy Hystrix Dashboard sẽ có kết quả như sau:
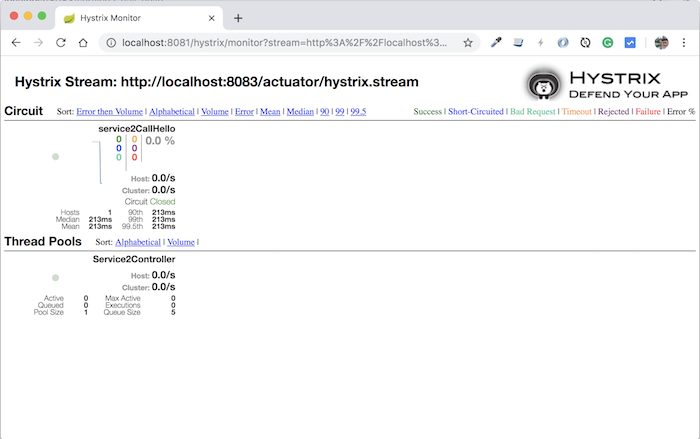
Các bạn có thể thấy là chúng ta không thể monitor nhiều service cùng một lúc trong Hystrix Dashboard được.
Bây giờ chúng ta thử sử dụng Turbine Stream các bạn nhé.
Để sử dụng Turbine Stream, các bạn cần sử dụng một MQ server để tất cả các data sẽ được gửi tới MQ server này.
Ở đây, mình sẽ sử dụng RabbitMQ server các bạn nhé! Các bạn có thể tham khảo các bài viết về cài đặt RabbitMQ với Management UI cho nó để start một RabbitMQ server cho mình.
RabbitMQ server của mình start như sau:
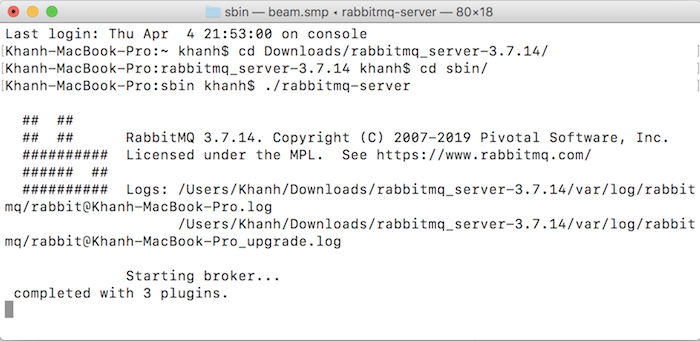
Username và password để access RabbitMQ này sẽ là guest/guest các bạn nhé!
OK, bây giờ chúng ta sẽ cấu hình service 2 và service 3 để chúng có thể gửi data tới MQ server.
Mình sẽ thêm vào mỗi service project các dependency như sau:
|
1 2 3 4 5 6 7 8 |
<dependency> <groupId>org.springframework.cloud</groupId> <artifactId>spring-cloud-netflix-hystrix-stream</artifactId> </dependency> <dependency> <groupId>org.springframework.cloud</groupId> <artifactId>spring-cloud-starter-stream-rabbit</artifactId> </dependency> |
Hiện tại phiên bản mới nhất của Spring Cloud đang có vấn đề, Turbine Stream không work với phiên bản này, các bạn cần sử dụng Spring Cloud version Greenwich.M1. Hãy mở tập tin pom.xml của 2 service 2 và 3, chỉnh sửa version của Spring Cloud như sau các bạn nhé!
|
1 2 3 4 |
<properties> <java.version>1.8</java.version> <spring-cloud.version>Greenwich.M1</spring-cloud.version> </properties> |
Cấu hình thông tin của RabbitMQ để các service này send data tới MQ server trong tập tin application.properties như sau:
|
1 2 3 4 |
spring.rabbitmq.host=localhost spring.rabbitmq.port=5672 spring.rabbitmq.username=guest spring.rabbitmq.password=guest |
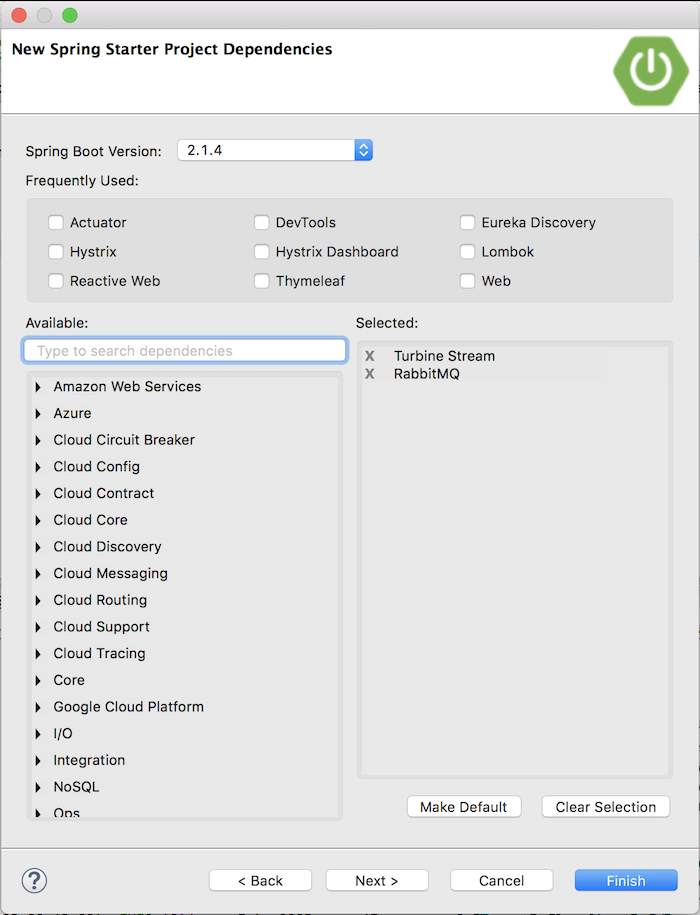
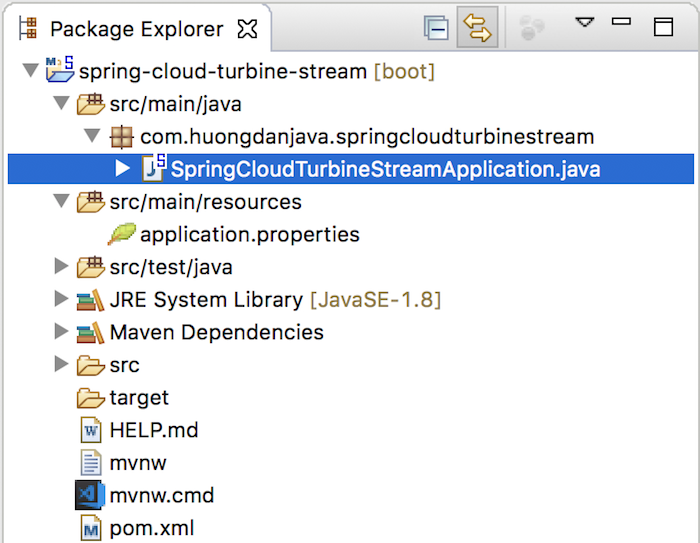
Sau khi cấu hình xong phần send data tới MQ Server cho các service, các bạn cần tạo một project khác đóng vai trò là Turbine Stream, sẽ combine data trong MQ server để gửi cho Hystrix Dashboard.
Project này như sau:
Kết quả:
Trong class SpringCloudTurbineStreamApplication, các bạn hãy thêm annotation @EnableTurbineStream để hiện thực Turbine Stream. Mặc định Turbine Stream sẽ cố gắng đăng ký nó với Eureka Server nên nếu các bạn không disable đi, sẽ có nhiều lỗi xuất hiện.
Các bạn hãy disable cái này và cấu hình thông tin của RabbitMQ server trong tập tin application.properties của project này như sau:
|
1 2 3 4 5 6 7 8 9 |
server.port=8989 spring.rabbitmq.host=localhost spring.rabbitmq.port=5672 spring.rabbitmq.username=guest spring.rabbitmq.password=guest eureka.client.register-with-eureka=false eureka.client.fetch-registry=false |
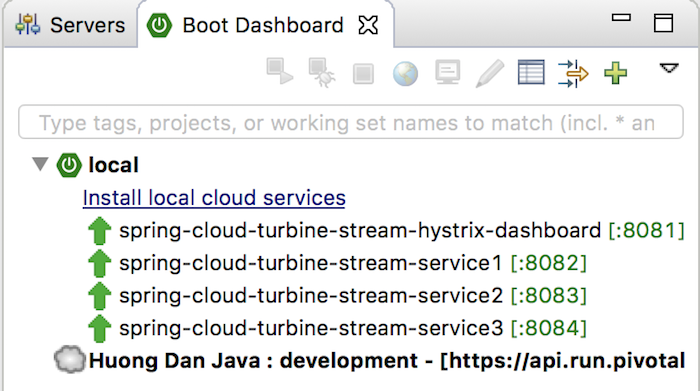
OK, giờ hãy start tất cả các ứng dụng lên các bạn nhé:
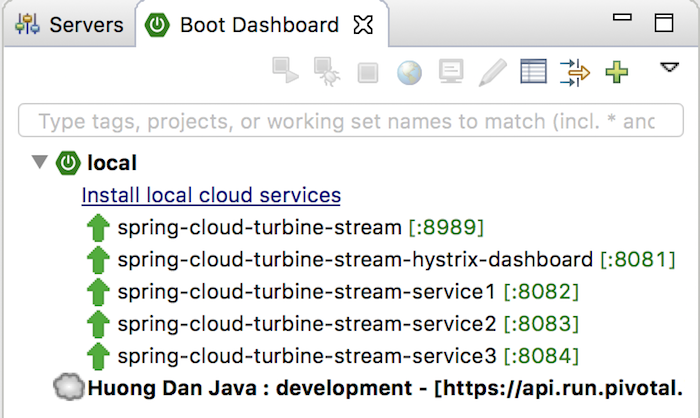
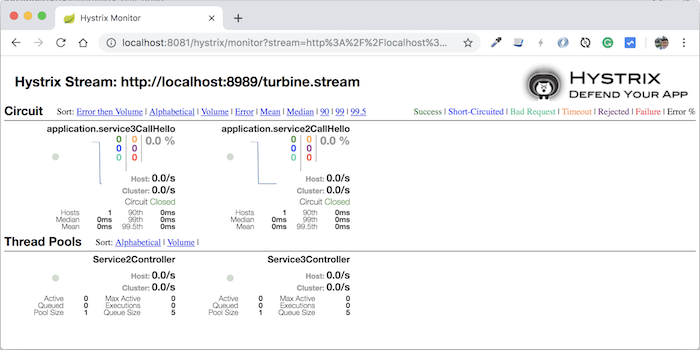
Đi đến Hystrix Dashboard, nhập thông tin của Turbine Stream http://localhost:8989/turbine.stream, nhấn nút Monitor Stream, gọi request của 2 service 2 và 3: http://localhost:8083/service2-call-hello, http://localhost:8084/service3-call-hello, các bạn sẽ thấy kết quả như sau: