Trong bài viết trước, mình đã hướng dẫn các bạn cách đăng ký một service vào Consul sử dụng Consul API. Nếu ứng dụng của các bạn sử dụng Java và Spring framework thì các bạn cũng có thể làm điều này sử dụng Spring Cloud Consul. Chúng ta còn có thể discover thông tin các service khác sử dụng module Spring Cloud Consul này. Cụ thể như thế nào? Trong bài viết này, chúng ta sẽ cùng nhau tìm hiểu làm thế nào để connect tới Consul, lấy thông tin của các service đã đăng ký với Consul và gọi tới chúng, sử dụng Spring Cloud Consul các bạn nhé!
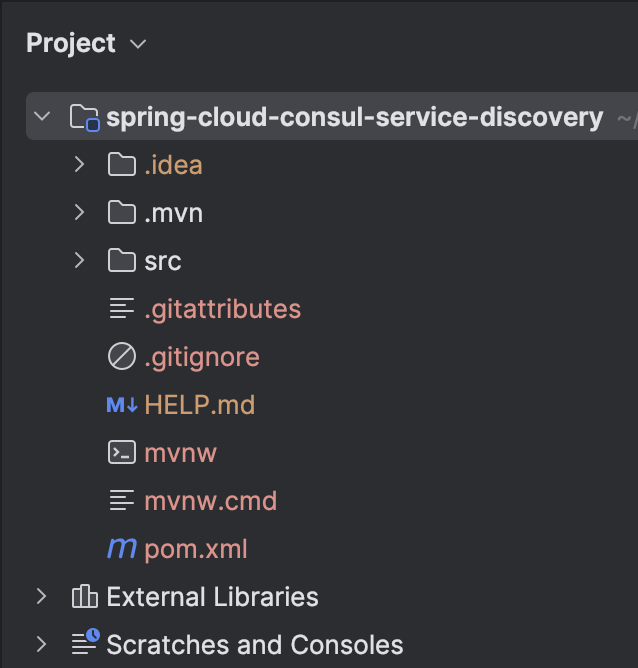
Đầu tiên, mình sẽ tạo mới một Spring Boot project với Spring Web, Actuator và Spring Cloud Consul Service Discovery như sau:
Spring Web để xây dựng ứng dụng web, Actuator là để expose healthcheck endpoint để Consul có thể healh check service đó các bạn!
Với cơ chế auto-configuration của Spring Cloud Consul Service Discovery, các bạn chỉ cần khai báo thông tin của Consul server trong tập tin cấu hình của Spring Boot:
|
1 2 3 4 5 6 7 8 |
spring: cloud: consul: port: 8500 host: localhost application: name: spring-cloud-consul-service-discovery |
là ứng dụng của chúng ta đã có thể connect tới Consul server, đăng ký và discover các service đã đăng ký bên trong Consul server này rồi.
Một lưu ý là các bạn cần khai báo property spring.application.name với tên của ứng dụng để Spring Cloud Consul sử dụng nó để đăng ký với Consul các bạn nhé! Và nếu service của các bạn deploy khác server với Consul, thì các bạn có thể sử dụng property spring.cloud.consul.discovery.hostname để khai báo thông tin server name, ví dụ như sau:
|
1 2 3 4 5 6 7 |
spring: cloud: consul: port: 8500 host: localhost discovery: hostname: host.docker.internal |
Tên của ứng dụng phải bắt đầu với một chữ cái, kết thúc với một chữ cái hoặc số và chúng ta chỉ sử dụng chữ cái, số hoặc dầu gạch ngang trong tên của ứng dụng.
Mặc định thì Spring Cloud Consul đăng ký health check endpoint sử dụng endpoint “/health” của Actuator nên các bạn cũng cần expose endpoint này nhé:
|
1 2 3 4 5 |
management: endpoints: web: exposure: include: health |
Nếu bây giờ, mình chạy ứng dụng ví dụ này rồi đi đến địa chỉ liệt kê danh sách các service đăng ký với Consul http://localhost:8500/ui/dc1/services, các bạn sẽ thấy kết quả như mình như sau:
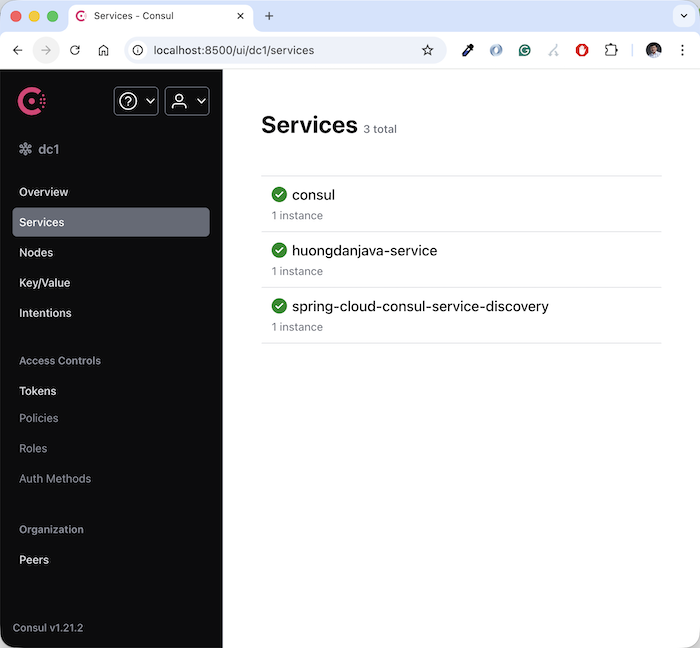
huongdanjava-service là service mà mình đã đăng ký trong bài viết Đăng ký service với Consul sử dụng Consul API đó các bạn!
Như vậy là service của chúng ta đã đăng ký thành công với Consul rồi đó các bạn.
Các bạn có thể disable cơ chế auto đăng ký và discover các service khác sử dụng các properties sau:
|
1 2 3 4 5 6 7 8 9 |
spring: cloud: consul: port: '8500' host: localhost discovery: enabled: false service-registry: enabled: false |
Mặc định thì giá trị của các properties này là true các bạn nhé!
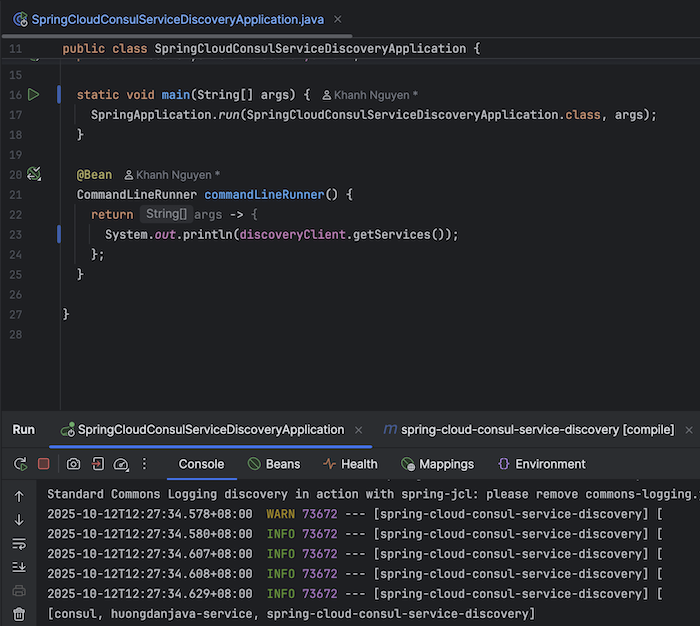
Để lấy thông tin của các registered service trong Consul, các bạn có thể sử dụng bean của class DiscoveryClient, ví dụ như sau:
|
1 2 3 4 5 6 7 8 9 10 11 12 13 14 15 16 17 18 19 20 21 22 23 24 25 26 27 |
package com.huongdanjava.springcloud.consul; import org.springframework.beans.factory.annotation.Autowired; import org.springframework.boot.CommandLineRunner; import org.springframework.boot.SpringApplication; import org.springframework.boot.autoconfigure.SpringBootApplication; import org.springframework.cloud.client.discovery.DiscoveryClient; import org.springframework.context.annotation.Bean; @SpringBootApplication public class SpringCloudConsulServiceDiscoveryApplication { @Autowired private DiscoveryClient discoveryClient; static void main(String[] args) { SpringApplication.run(SpringCloudConsulServiceDiscoveryApplication.class, args); } @Bean CommandLineRunner commandLineRunner() { return args -> { System.out.println(discoveryClient.getServices()); }; } } |
Chạy ứng dụng ví dụ này, các bạn sẽ thấy kết quả như mình như sau:
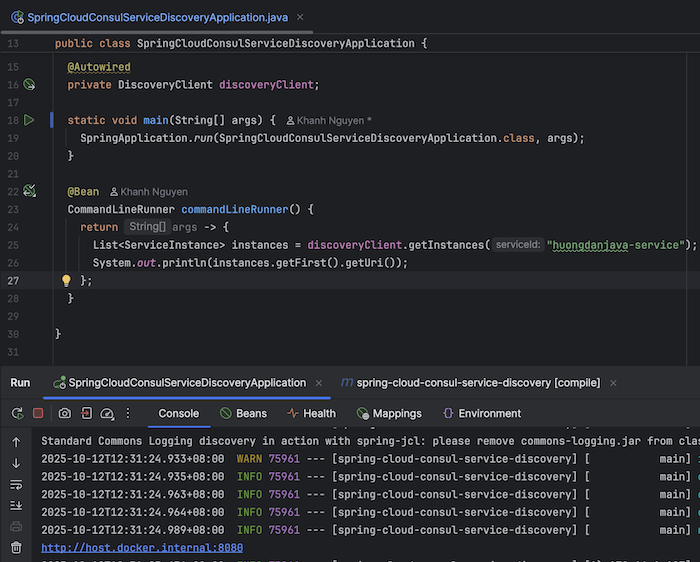
Để lấy thông tin của một service và call tới nó, các bạn có thể sử dụng phương thức getInstances() của class DiscoveryClient. Tham số của phương thức getInstances() này là tên của service các bạn nhé! Thông tin trả về sẽ là danh sách các instance tương ứng của service này.
Ví dụ của mình như sau:
|
1 2 3 4 5 6 7 8 9 10 11 12 13 14 15 16 17 18 19 20 21 22 23 24 25 26 27 28 29 30 |
package com.huongdanjava.springcloud.consul; import java.util.List; import org.springframework.beans.factory.annotation.Autowired; import org.springframework.boot.CommandLineRunner; import org.springframework.boot.SpringApplication; import org.springframework.boot.autoconfigure.SpringBootApplication; import org.springframework.cloud.client.ServiceInstance; import org.springframework.cloud.client.discovery.DiscoveryClient; import org.springframework.context.annotation.Bean; @SpringBootApplication public class SpringCloudConsulServiceDiscoveryApplication { @Autowired private DiscoveryClient discoveryClient; static void main(String[] args) { SpringApplication.run(SpringCloudConsulServiceDiscoveryApplication.class, args); } @Bean CommandLineRunner commandLineRunner() { return args -> { List<ServiceInstance> instances = discoveryClient.getInstances("huongdanjava-service"); System.out.println(instances.getFirst().getUri()); }; } } |
Kết quả:
 Như vậy là chúng ta đã lấy được thông tin của các service được đăng ký trong Consul server rồi đó các bạn!