Trong bài viết trước, mình đã hướng dẫn với các bạn type Query trong GraphQL và cũng đã sử dụng Spring GraphQL cùng với Spring Data R2DBC để hiện thực GraphQL request để truy vấn thông tin sinh viên. Để thêm mới, chỉnh sửa, xoá thông tin sinh viên với GraphQL, chúng ta cần sử dụng type Mutation. Cách hiện thực type Mutation với Spring GraphQL như thế nào? Hãy cùng nhau tìm hiểu với mình trong bài viết này các bạn nhé!
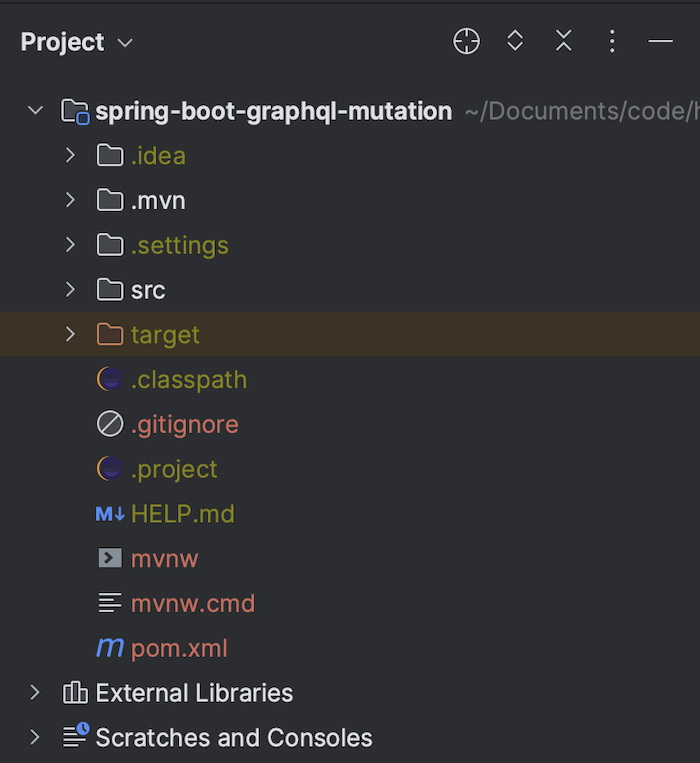
Đầu tiên, mình cũng sẽ tạo một Spring Boot project với Spring Web, Spring for GraphQL, Spring Data R2DBC và PostgreSQL Driver để làm ví dụ.
Kết quả:
Mình sẽ định nghĩa class Repository cho table “student”:
|
1 2 3 4 5 |
CREATE TABLE student ( id uuid DEFAULT uuid_generate_v4() NOT NULL, name varchar(50) NOT NULL, PRIMARY KEY (id) ) |
như sau:
|
1 2 3 4 5 6 7 8 |
package com.huongdanjava.graphql; import java.util.UUID; import org.springframework.data.r2dbc.repository.R2dbcRepository; public interface StudentRepository extends R2dbcRepository<Student, UUID> { } |
với Student model có nội dung như sau:
|
1 2 3 4 5 6 7 8 9 10 11 12 13 14 15 16 17 18 19 20 21 22 23 24 25 26 27 28 29 30 |
package com.huongdanjava.graphql; import java.util.UUID; import org.springframework.data.annotation.Id; import org.springframework.data.relational.core.mapping.Table; @Table public class Student { @Id private UUID id; private String name; public UUID getId() { return id; } public void setId(UUID id) { this.id = id; } public String getName() { return name; } public void setName(String name) { this.name = name; } } |
Để làm ví dụ, mình đã tạo mới tập tin schema.graphqls định nghĩa type Mutation để thêm mới thông tin sinh viên trong database như sau:
|
1 2 3 4 5 6 7 8 9 10 11 12 13 14 15 16 17 18 |
type Query { students: [Student] } type Mutation { addStudent(student: StudentInput!): Student! updateStudent(student: StudentInput!): Student! deleteStudent(studentId: ID!): String! } type Student { id: ID, name: String } input StudentInput { name: String } |
Theo specification của GraphQL thì type Query là bắt buộc phải được định nghĩa trong mỗi GraphQL Schema các bạn nhé! Ở đây, mình chỉ định nghĩa đơn giản một field để lấy thông tin của tất cả sinh viên.
Với type Mutation, các bạn chỉ có thể sử dụng các scalar type như Int, Float, String, Boolean, và ID trong các tham số input của các fields. Để sử dụng các input nhiều thông tin, các bạn cần định nghĩa input type như mình đã làm như trên với input StudentInput. Các thông tin còn lại như type trả về, dấu “!” để chỉ định thông tin bắt buộc thì giống như định nghĩa của type Query các bạn nhé!
Để hiện thực type Mutation mà chúng ta định nghĩa ở trên với Spring GraphQL, các bạn có thể thêm mới một Controller có nội dung như sau:
|
1 2 3 4 5 6 7 8 9 10 11 12 13 14 15 16 17 18 19 20 21 22 23 24 25 26 27 28 29 30 31 32 33 34 35 36 37 38 39 40 |
package com.huongdanjava.graphql; import java.util.UUID; import org.springframework.beans.factory.annotation.Autowired; import org.springframework.graphql.data.method.annotation.Argument; import org.springframework.graphql.data.method.annotation.MutationMapping; import org.springframework.graphql.data.method.annotation.QueryMapping; import org.springframework.stereotype.Controller; import reactor.core.publisher.Flux; import reactor.core.publisher.Mono; @Controller public class GraphQLController { @Autowired private StudentRepository studentRepository; @QueryMapping public Flux<Student> students() { return studentRepository.findAll(); } @MutationMapping public Mono<Student> addStudent(@Argument("student") Student student) { return studentRepository.save(student); } @MutationMapping public Mono<Student> updateStudent(@Argument("studentId") String id, @Argument("student") Student student) { student.setId(UUID.fromString(id)); return studentRepository.save(student); } @MutationMapping public Mono<String> deleteStudent(@Argument("studentId") String id) { return studentRepository.deleteById(UUID.fromString(id)) .then(Mono.just("Deleted!")); } } |
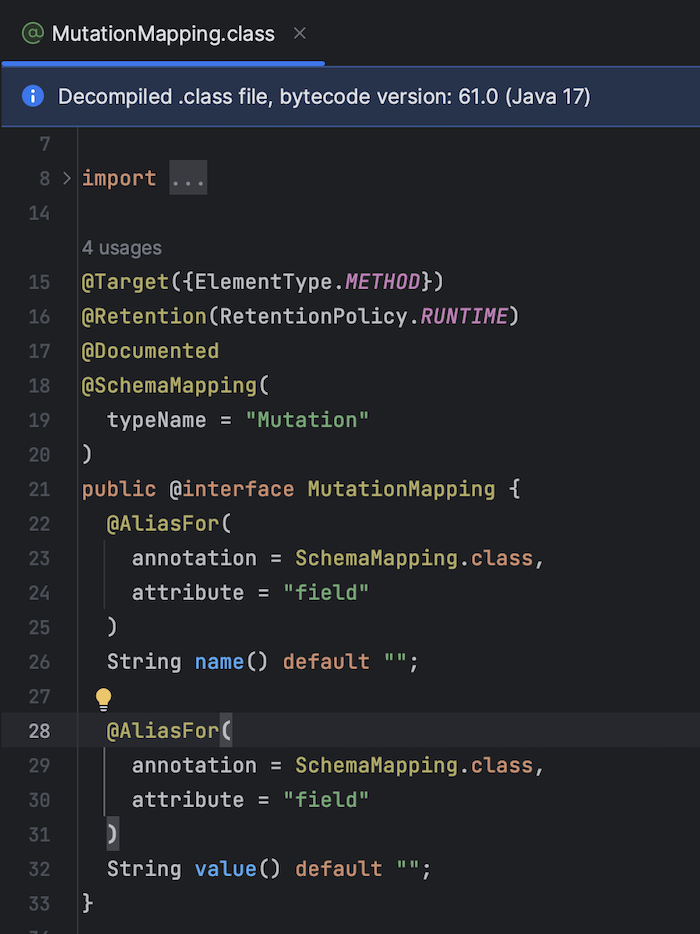
Tương tự như type QueryMapping sử dụng annotation @QueryMapping, các bạn có thể sử dụng annotation @MutationMapping để hiện thực cho type Mutation. Annotation này cũng được xây dựng từ annotation @SchemaMapping với typeName là “Mutation” đó các bạn:
Mặc định thì Spring cũng scan và map tên method trong controller với field của type Mutation để process request từ người dùng các bạn nhé.
Chúng ta sẽ sử dụng annotation @Argument để bind các tham số được định nghĩa trong field của Mutation với tham số trong method handle request controller như các bạn thấy.
Bây giờ, nếu các bạn chạy ứng dụng lên rồi sau đó thử thêm mới sinh viên:
|
1 2 3 4 5 6 7 8 |
mutation { addStudent(student: { name: "Thanh" }) { id name } } |
các bạn sẽ thấy kết quả như sau:
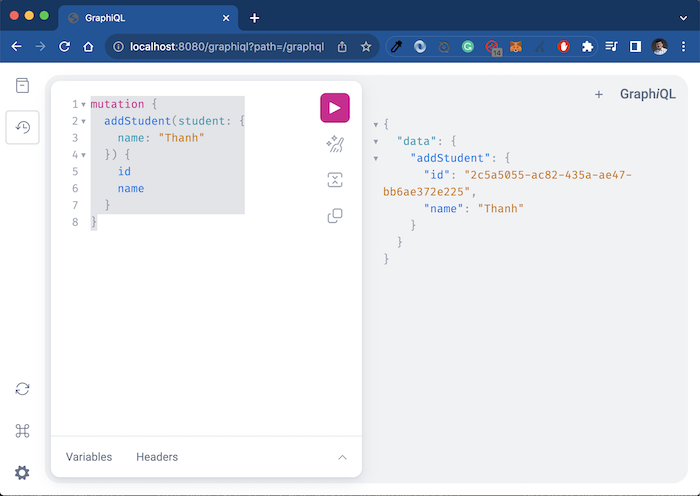
Lấy giá trị id của sinh viên mới thêm vào sau đó gọi request để cập nhập thông tin cho sinh viên này:
|
1 2 3 4 5 6 7 8 9 |
mutation { updateStudent( studentId: "2c5a5055-ac82-435a-ae47-bb6ae372e225" student: {name: "Khanh"} ) { id name } } |
các bạn sẽ thấy kết quả như sau:
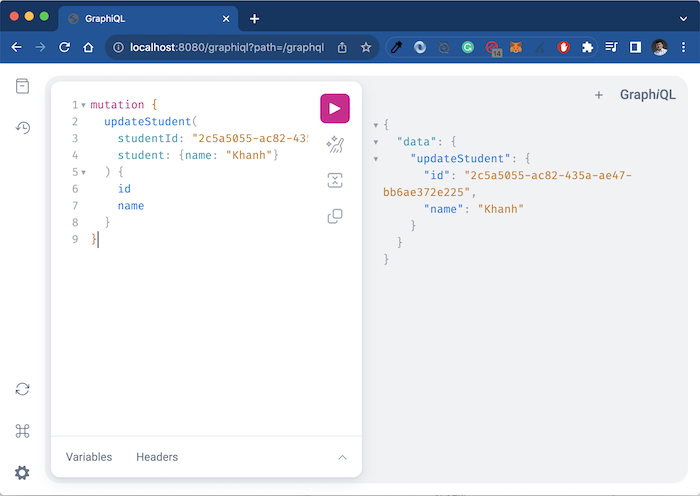
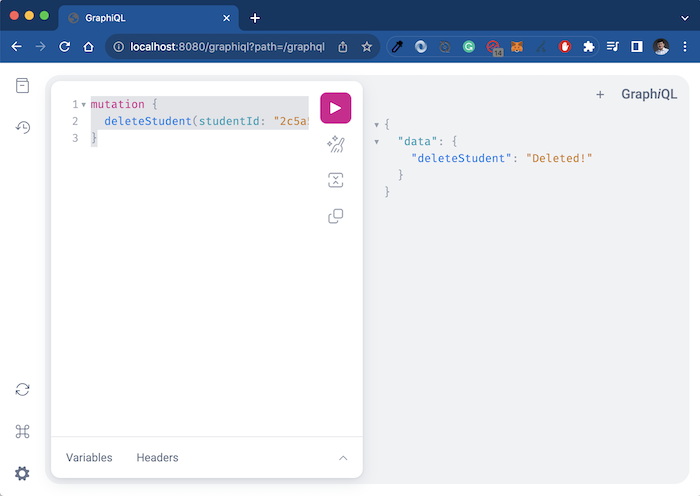
Bây giờ, nếu bạn xoá thông tin sinh viên này:
|
1 2 3 |
mutation { deleteStudent(studentId: "2c5a5055-ac82-435a-ae47-bb6ae372e225") } |
các bạn sẽ thấy kết quả như sau:
