Mình đã giới thiệu với các bạn cách đọc properties file trong Spring sử dụng đối tượng PropertyPlaceholderConfigurer, namespace util, namespace context. Tất cả các cách trên, chúng ta đều cần phải khai báo trong tập tin cấu hình của Spring. Trong bài viết này, mình giới thiệu với các bạn một cách nữa để đọc properties file trong Spring: đó chính là sử dụng annotation @PropertySource. Cụ thể như thế nào? Hãy đọc tiếp nhé các bạn.
Đầu tiên, mình sẽ tạo một Maven project để làm ví dụ:
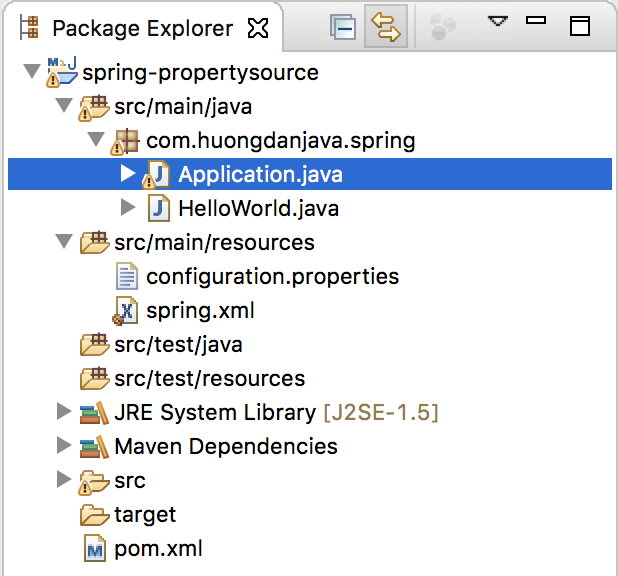
Mình sẽ sử dụng Java 17 cho ví dụ này:
|
1 2 3 4 |
<properties> <maven.compiler.source>17</maven.compiler.source> <maven.compiler.target>17</maven.compiler.target> </properties> |
Spring framework dependency:
|
1 2 3 4 5 |
<dependency> <groupId>org.springframework</groupId> <artifactId>spring-context</artifactId> <version>6.0.3</version> </dependency> |
Class Application có nội dung ban đầu như sau:
|
1 2 3 4 5 6 7 8 9 10 11 12 |
package com.huongdanjava.spring; import org.springframework.context.ApplicationContext; import org.springframework.context.support.ClassPathXmlApplicationContext; public class Application { public static void main(String[] args) { ApplicationContext context = new ClassPathXmlApplicationContext("spring.xml"); } } |
Class HelloWorld là class cần sử dụng properties được khai báo trong tập tin configuration.properties, nó có nội dung ban đầu như sau:
|
1 2 3 4 5 6 7 8 9 10 11 12 13 14 15 16 17 18 |
package com.huongdanjava.spring; public class HelloWorld { private String name; public void print() { System.out.print("Hello, " + name); } public String getName() { return name; } public void setName(String name) { this.name = name; } } |
Trong ví dụ của mình thì tập tin spring.xml chính là tập tin cấu hình của Spring còn tập tin configuration.properties là tập tin cấu hình của ứng dụng. Nội dung của những tập tin này như sau:
spring.xml
|
1 2 3 4 5 |
<beans xmlns="http://www.springframework.org/schema/beans" xmlns:xsi="http://www.w3.org/2001/XMLSchema-instance" xsi:schemaLocation="http://www.springframework.org/schema/beans http://www.springframework.org/schema/beans/spring-beans.xsd"> </beans> |
configuration.properties
|
1 |
app.author=Khanh Nguyen |
Bây giờ, mình sẽ sử dụng annotation @PropertySource để đọc properties trong tập tin configuration.properties lên, sau đó class HelloWorld sẽ sử dụng nhé các bạn.
Đầu tiên, chúng ta cần sử dụng chức năng auto component scan của Spring để khai báo đối tượng HelloWorld trong Spring container trước.
Để làm được điều này, chúng ta cần khai báo thẻ context:component-scan trong tập tin cấu hình của Spring với base package là com.huongdanjava.spring:
|
1 2 3 4 5 6 7 8 |
<beans xmlns="http://www.springframework.org/schema/beans" xmlns:xsi="http://www.w3.org/2001/XMLSchema-instance" xmlns:context="http://www.springframework.org/schema/context" xsi:schemaLocation="http://www.springframework.org/schema/beans http://www.springframework.org/schema/beans/spring-beans.xsd http://www.springframework.org/schema/context http://www.springframework.org/schema/context/spring-context.xsd"> <context:component-scan base-package="com.huongdanjava.spring" /> </beans> |
và khai báo annotation @Component trong class HelloWorld:
|
1 2 3 4 5 6 7 8 9 10 11 12 13 14 15 16 17 18 19 20 21 |
package com.huongdanjava.spring; import org.springframework.stereotype.Component; @Component public class HelloWorld { private String name; public void print() { System.out.print("Hello, " + name); } public String getName() { return name; } public void setName(String name) { this.name = name; } } |
Bây giờ mình sẽ sử dụng annotation @PropertySource để đọc tập tin configuration.properties, bằng cách khai báo nó trong class HelloWorld như sau:
|
1 2 3 4 5 6 7 8 9 10 11 12 13 14 15 16 17 18 19 20 21 22 23 |
package com.huongdanjava.spring; import org.springframework.context.annotation.PropertySource; import org.springframework.stereotype.Component; @Component @PropertySource("classpath:configuration.properties") public class HelloWorld { private String name; public void print() { System.out.print("Hello, " + name); } public String getName() { return name; } public void setName(String name) { this.name = name; } } |
Với khai báo trên, Spring sẽ sử dụng đường dẫn là giá trị của annotation @PropertySource để tìm kiếm tập tin properties và đọc tất cả các properties có trong tập tin này lên. Trong khai báo trên của mình, mình đã sử dụng biến classpath, tương ứng với đường dẫn /src/main/resources, rồi cộng với tên tập tin.
Giờ thì chúng ta có thể sử dụng annotation @Value để inject giá trị của property “app.author” vào giá trị của thuộc tính name trong đối tượng HelloWorld rồi.
|
1 2 3 4 5 6 7 8 9 10 11 12 13 14 15 16 17 18 19 20 21 22 23 24 25 |
package com.huongdanjava.spring; import org.springframework.beans.factory.annotation.Value; import org.springframework.context.annotation.PropertySource; import org.springframework.stereotype.Component; @Component @PropertySource("classpath:configuration.properties") public class HelloWorld { @Value("${app.author}") private String name; public void print() { System.out.print("Hello, " + name); } public String getName() { return name; } public void setName(String name) { this.name = name; } } |
Sử dụng đối tượng HelloWorld trong ứng dụng:
|
1 2 3 4 5 6 7 8 9 10 11 12 13 14 |
package com.huongdanjava.spring; import org.springframework.context.ApplicationContext; import org.springframework.context.support.ClassPathXmlApplicationContext; public class Application { public static void main(String[] args) { ApplicationContext context = new ClassPathXmlApplicationContext("spring.xml"); HelloWorld helloWorld = (HelloWorld) context.getBean("helloWorld"); helloWorld.print(); } } |
các bạn sẽ thấy kết quả như sau:
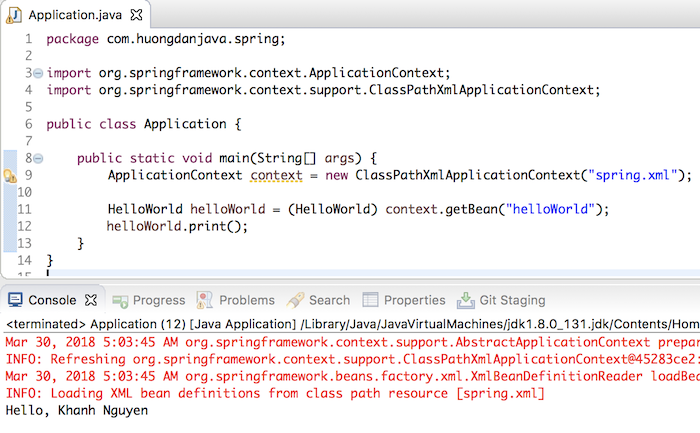
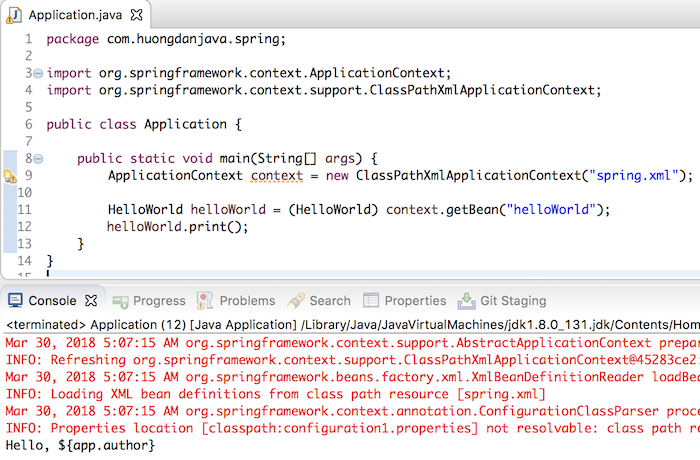
Annotation @PropertySource cũng hỗ trợ chúng ta ignoreResourceNotFound, để trong trường hợp tập tin properties không tồn tại thì không có lỗi gì xảy ra cả, khai báo như sau nhé các bạn:
|
1 2 3 4 5 6 7 8 9 10 11 12 13 14 15 16 17 18 19 20 21 22 23 24 25 |
package com.huongdanjava.spring; import org.springframework.beans.factory.annotation.Value; import org.springframework.context.annotation.PropertySource; import org.springframework.stereotype.Component; @Component @PropertySource(value = "classpath:configuration1.properties", ignoreResourceNotFound = true) public class HelloWorld { @Value("${app.author}") private String name; public void print() { System.out.print("Hello, " + name); } public String getName() { return name; } public void setName(String name) { this.name = name; } } |
Kết quả:
Trong trường hợp các bạn có nhiều properties file cần được sử dụng trong ứng dụng của mình thì các bạn có thể sử dụng annotation @PropertySources cùng với khai báo nhiều annotation @PropertySource
Ví dụ như mình có thể một tập tin app.properties
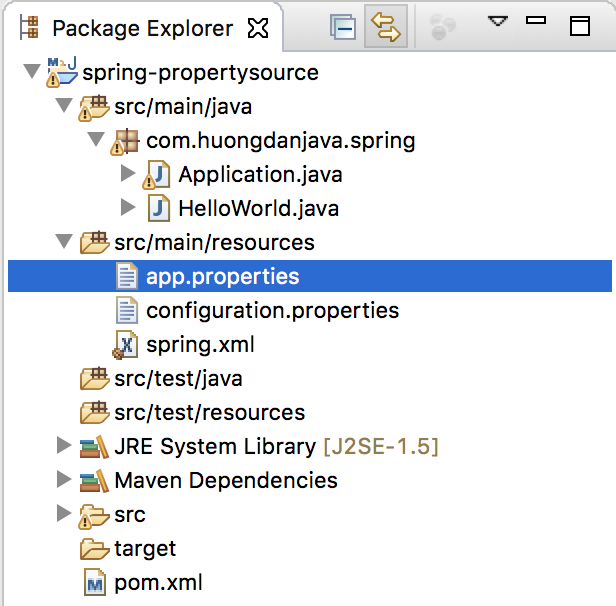
với nội dung như sau:
|
1 |
app.author=Huong Dan Java |
khi đó, mình có thể khai báo annotation @PropertySources trong class HelloWorld như sau:
|
1 2 3 4 5 6 7 8 9 10 11 12 13 14 15 16 17 18 19 20 21 22 23 24 25 26 27 28 |
package com.huongdanjava.spring; import org.springframework.beans.factory.annotation.Value; import org.springframework.context.annotation.PropertySource; import org.springframework.context.annotation.PropertySources; import org.springframework.stereotype.Component; @Component @PropertySources({ @PropertySource(value = "classpath:configuration.properties", ignoreResourceNotFound = true), @PropertySource(value = "classpath:app.properties", ignoreResourceNotFound = true)}) public class HelloWorld { @Value("${app.author}") private String name; public void print() { System.out.print("Hello, " + name); } public String getName() { return name; } public void setName(String name) { this.name = name; } } |
Tất nhiên, property nào được khai báo sau, sẽ được sử dụng.
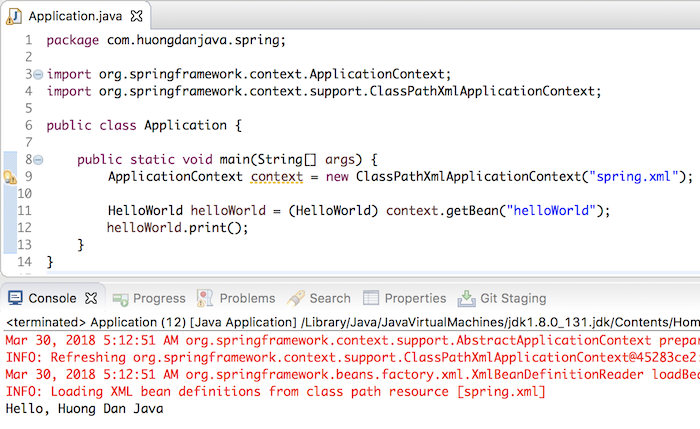
Kết quả:
