Mặc định, khi chúng ta tạo một Spring Boot project, nó sẽ chạy như là một ứng dụng web với một embedded web container như Tomcat, Jetty. Vậy trong trường hợp chúng ta muốn chạy Spring Boot project đó như là một ứng dụng Java console bình thường, thì phải làm thế nào? Trong bài viết này, mình sẽ hướng dẫn các bạn cách tạo ứng dụng Java console với Spring Boot project các bạn nhé!
Đầu tiên, các bạn cũng tạo Spring Boot project bình thường sử dụng Spring Tool Suite IDE hoặc Spring Initializr Web, nhưng chú ý là trong phần chọn dependencies, các bạn không chọn gì cả nhé.
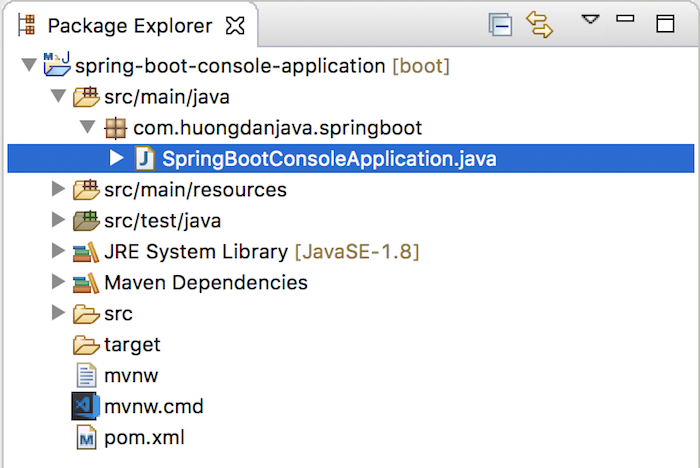
Ví dụ của mình như sau:

Để có thể chạy ví dụ này như là một ứng dụng Java console, các bạn hãy thêm implementation interface CommandLineRunner cho class main của ứng dụng Spring Boot các bạn nhé!
Trong ví dụ của mình là class SpringBootConsoleApplication:
|
1 2 3 4 5 6 7 8 9 10 11 12 13 |
package com.huongdanjava.springboot; import org.springframework.boot.CommandLineRunner; import org.springframework.boot.SpringApplication; import org.springframework.boot.autoconfigure.SpringBootApplication; @SpringBootApplication public class SpringBootConsoleApplication implements CommandLineRunner { public static void main(String[] args) { SpringApplication.run(SpringBootConsoleApplication.class, args); } } |
Interface CommandLineRunner này có một phương thức mà chúng ta phải implement, đó là phương thức run(). Đây cũng chính là phương thức giúp chúng ta có thể thực thi code dưới console.
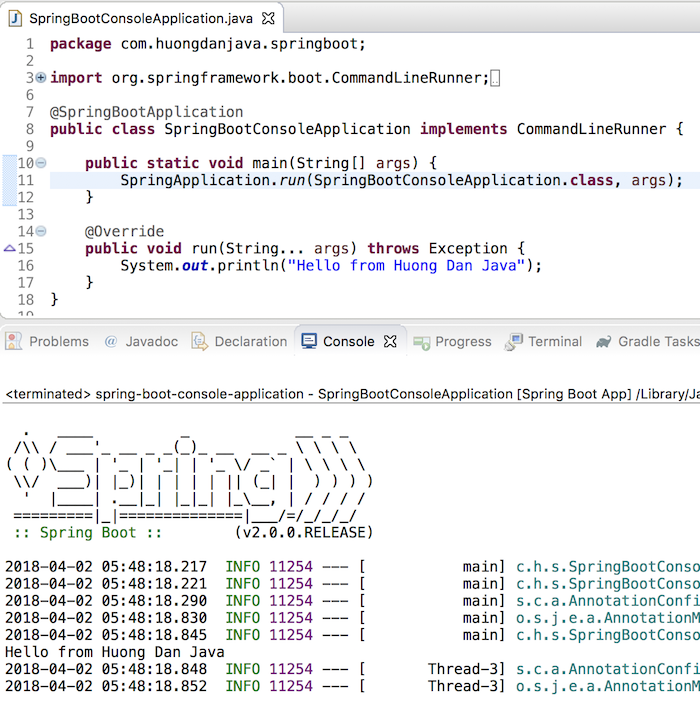
Ví dụ, giờ mình muốn in ra một message ở console thì mình sẽ code như sau:
|
1 2 3 4 5 6 7 8 9 10 11 12 13 14 15 16 17 18 |
package com.huongdanjava.springboot; import org.springframework.boot.CommandLineRunner; import org.springframework.boot.SpringApplication; import org.springframework.boot.autoconfigure.SpringBootApplication; @SpringBootApplication public class SpringBootConsoleApplication implements CommandLineRunner { public static void main(String[] args) { SpringApplication.run(SpringBootConsoleApplication.class, args); } @Override public void run(String... args) throws Exception { System.out.println("Hello from Huong Dan Java"); } } |
Kết quả:

Giả sử, giờ mình có một bean HelloWorld với nội dung như sau:
|
1 2 3 4 5 6 7 8 9 10 11 |
package com.huongdanjava.springboot; import org.springframework.stereotype.Component; @Component public class HelloWorld { public void say() { System.out.println("Hello, Khanh"); } } |
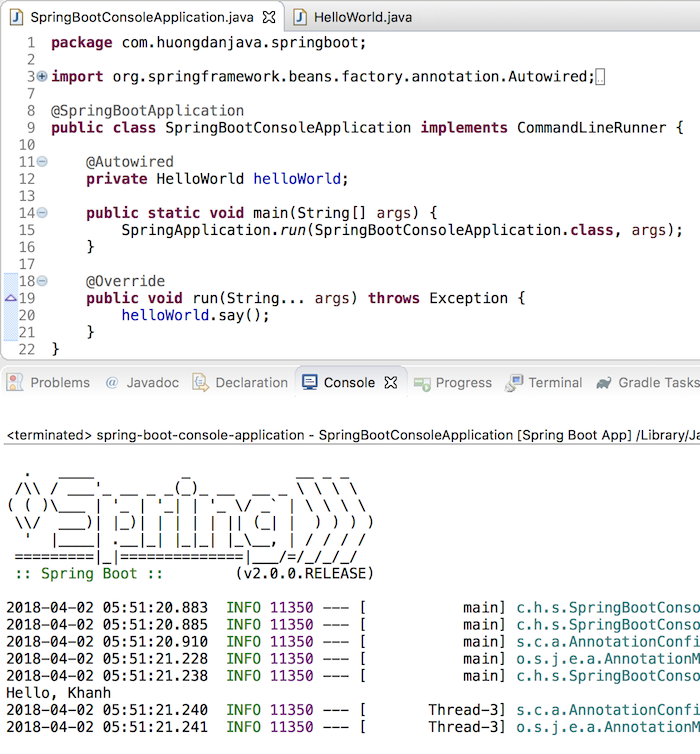
Khi đó, mình có thể sử dụng bean HelloWorld như sau:
|
1 2 3 4 5 6 7 8 9 10 11 12 13 14 15 16 17 18 19 20 21 22 |
package com.huongdanjava.springboot; import org.springframework.beans.factory.annotation.Autowired; import org.springframework.boot.CommandLineRunner; import org.springframework.boot.SpringApplication; import org.springframework.boot.autoconfigure.SpringBootApplication; @SpringBootApplication public class SpringBootConsoleApplication implements CommandLineRunner { @Autowired private HelloWorld helloWorld; public static void main(String[] args) { SpringApplication.run(SpringBootConsoleApplication.class, args); } @Override public void run(String... args) throws Exception { helloWorld.say(); } } |
Kết quả:

Ngoài cách khai báo implementation như trên, có một cách khác nữa là các bạn cũng có thể định nghĩa một bean cho interface CommandLinerRunner.
Ví dụ như sau:
|
1 2 3 4 5 6 7 8 9 10 11 12 13 14 15 16 17 18 19 20 21 22 23 24 25 26 |
package com.huongdanjava.springboot; import org.springframework.beans.factory.annotation.Autowired; import org.springframework.boot.CommandLineRunner; import org.springframework.boot.SpringApplication; import org.springframework.boot.autoconfigure.SpringBootApplication; import org.springframework.context.ApplicationContext; import org.springframework.context.annotation.Bean; @SpringBootApplication public class SpringBootConsoleApplication { @Autowired private HelloWorld helloWorld; public static void main(String[] args) { SpringApplication.run(SpringBootConsoleApplication.class, args); } @Bean public CommandLineRunner commandLineRunner(ApplicationContext ctx) { return args -> { helloWorld.say(); }; } } |
Kết quả cũng sẽ như trên đó các bạn!


