Trong bài viết trước, mình đã hướng dẫn các bạn cách hiện thực một Authorization Server sử dụng Spring Authorization Server, nhưng thông tin về RegisteredClient trong bài viết này được lưu trong memory. Để lưu thông tin RegisteredClient vào database thì chúng ta sẽ làm như thế nào? Trong bài viết này, mình sẽ hướng dẫn các bạn làm điều này các bạn nhé!
Đầu tiên, mình cũng tạo mới một Spring Boot project với Spring Web Starter, Spring Security Starter, Spring Data JPA, PostgreSQL Driver và OAuth2 Authorization Server Starter:
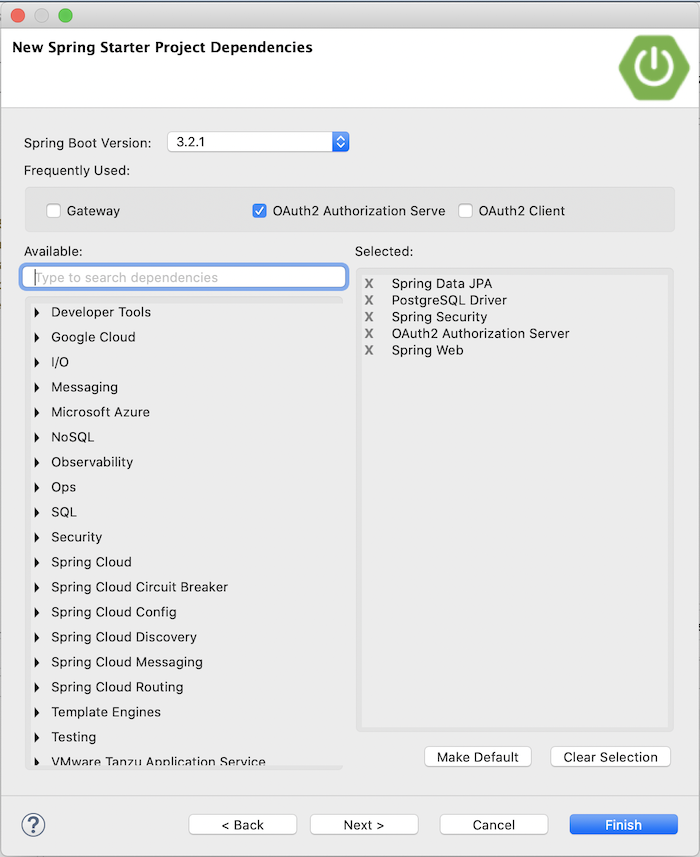
để làm ví dụ.
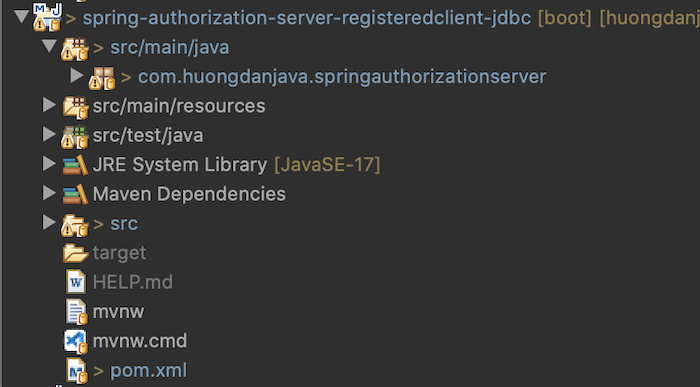
Kết quả:
Mình sẽ cấu hình Spring Security như trong bài viết Hiện thực OAuth Authorization Server sử dụng Spring Authorization Server như sau:
|
1 2 3 4 5 6 7 8 9 10 11 12 13 14 15 16 17 18 19 20 21 22 23 24 25 26 27 28 29 30 31 32 33 34 35 36 37 38 39 40 41 42 43 |
package com.huongdanjava.springauthorizationserver; import org.springframework.context.annotation.Bean; import org.springframework.context.annotation.Configuration; import org.springframework.security.config.Customizer; import org.springframework.security.config.annotation.web.builders.HttpSecurity; import org.springframework.security.config.annotation.web.configuration.EnableWebSecurity; import org.springframework.security.core.userdetails.User; import org.springframework.security.core.userdetails.UserDetails; import org.springframework.security.core.userdetails.UserDetailsService; import org.springframework.security.provisioning.InMemoryUserDetailsManager; import org.springframework.security.web.SecurityFilterChain; @Configuration @EnableWebSecurity public class SpringSecurityConfiguration { @Bean SecurityFilterChain defaultSecurityFilterChain(HttpSecurity http) throws Exception { // @formatter:off http .authorizeHttpRequests(authorizeRequests -> authorizeRequests.anyRequest().authenticated() ) .formLogin(Customizer.withDefaults()); // @formatter:on return http.build(); } @Bean public UserDetailsService users() { // @formatter:off UserDetails user = User.withDefaultPasswordEncoder() .username("admin") .password("password") .roles("ADMIN").build(); // @formatter:on return new InMemoryUserDetailsManager(user); } } |
Còn cấu hình cho Authorization Server, mình cũng làm tương tự như bài viết Hiện thực OAuth Authorization Server sử dụng Spring Authorization Server này nhưng phần khai báo thông tin RegisteredClient mình sẽ làm sau:
|
1 2 3 4 5 6 7 8 9 10 11 12 13 14 15 16 17 18 19 20 21 22 23 24 25 26 27 28 29 30 31 32 33 34 35 36 37 38 39 40 41 42 43 44 45 46 47 48 49 50 51 52 53 54 55 56 57 58 59 60 61 62 63 64 65 66 67 |
package com.huongdanjava.springauthorizationserver; import java.security.KeyPair; import java.security.KeyPairGenerator; import java.security.NoSuchAlgorithmException; import java.security.interfaces.RSAPrivateKey; import java.security.interfaces.RSAPublicKey; import java.util.UUID; import org.springframework.context.annotation.Bean; import org.springframework.context.annotation.Configuration; import org.springframework.core.Ordered; import org.springframework.core.annotation.Order; import org.springframework.security.config.Customizer; import org.springframework.security.config.annotation.web.builders.HttpSecurity; import org.springframework.security.oauth2.jwt.JwtDecoder; import org.springframework.security.oauth2.server.authorization.config.annotation.web.configuration.OAuth2AuthorizationServerConfiguration; import org.springframework.security.web.SecurityFilterChain; import com.nimbusds.jose.jwk.JWKSet; import com.nimbusds.jose.jwk.RSAKey; import com.nimbusds.jose.jwk.source.JWKSource; import com.nimbusds.jose.proc.SecurityContext; @Configuration public class AuthorizationServerConfiguration { @Bean @Order(Ordered.HIGHEST_PRECEDENCE) public SecurityFilterChain authorizationServerSecurityFilterChain(HttpSecurity http) throws Exception { OAuth2AuthorizationServerConfiguration.applyDefaultSecurity(http); return http.formLogin(Customizer.withDefaults()).build(); } @Bean public JwtDecoder jwtDecoder(JWKSource<SecurityContext> jwkSource) { return OAuth2AuthorizationServerConfiguration.jwtDecoder(jwkSource); } @Bean public JWKSource<SecurityContext> jwkSource() throws NoSuchAlgorithmException { RSAKey rsaKey = generateRsa(); JWKSet jwkSet = new JWKSet(rsaKey); return (jwkSelector, securityContext) -> jwkSelector.select(jwkSet); } private static RSAKey generateRsa() throws NoSuchAlgorithmException { KeyPair keyPair = generateRsaKey(); RSAPublicKey publicKey = (RSAPublicKey) keyPair.getPublic(); RSAPrivateKey privateKey = (RSAPrivateKey) keyPair.getPrivate(); // @formatter:off return new RSAKey.Builder(publicKey) .privateKey(privateKey) .keyID(UUID.randomUUID().toString()) .build(); // @formatter:on } private static KeyPair generateRsaKey() throws NoSuchAlgorithmException { KeyPairGenerator keyPairGenerator = KeyPairGenerator.getInstance("RSA"); keyPairGenerator.initialize(2048); return keyPairGenerator.generateKeyPair(); } } |
Để lưu thông tin RegisteredClient vào database, đầu tiên, chúng ta cần định nghĩa database structure để làm việc này.
Mặc định thì Spring Authorization Server cung cấp cho chúng ta script database để tạo database structure. Các bạn có thể copy chúng trong tập tin .jar của Spring Authorization Server:
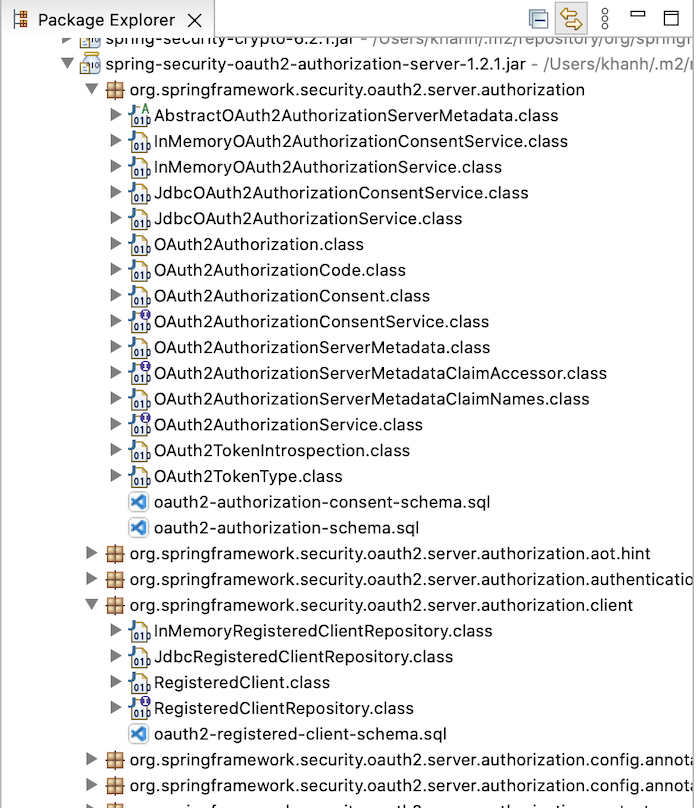
Các bạn có thể vào Github của Spring Authorization Server ở đây để copy những tập tin này.
Mình sẽ sử dụng Flyway để quản lý database migration:
|
1 2 3 4 |
<dependency> <groupId>org.flywaydb</groupId> <artifactId>flyway-core</artifactId> </dependency> |
bằng cách copy những tập tin schema của Spring Authorization Server vào thư mục src/main/resources/db/migration như sau:
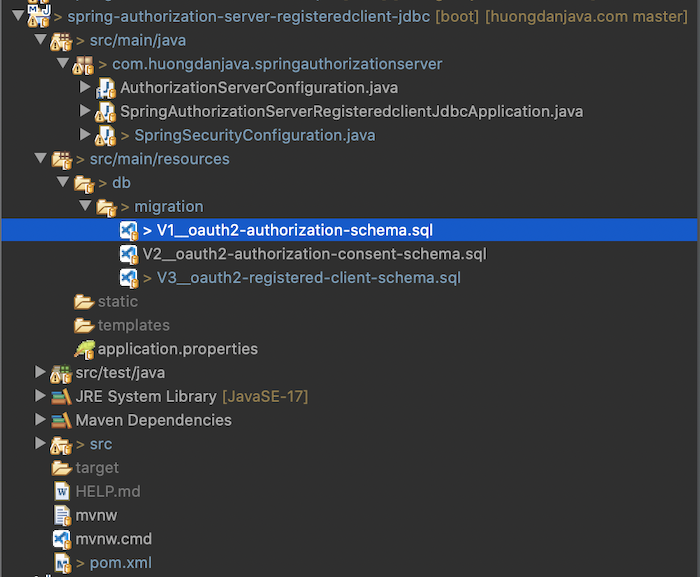
Trong script tạo table oauth2_authorization trong tập tin V1__oauth2-authorization-schema.sql có định nghĩa kiểu dữ liệu BLOB, có lẽ cho Oracle database:
|
1 2 3 4 5 6 7 8 9 10 11 12 13 14 15 16 17 18 19 20 21 22 23 24 25 26 27 28 29 30 31 32 33 34 35 36 |
CREATE TABLE oauth2_authorization ( id varchar(100) NOT NULL, registered_client_id varchar(100) NOT NULL, principal_name varchar(200) NOT NULL, authorization_grant_type varchar(100) NOT NULL, authorized_scopes varchar(1000) DEFAULT NULL, attributes blob DEFAULT NULL, state varchar(500) DEFAULT NULL, authorization_code_value blob DEFAULT NULL, authorization_code_issued_at timestamp DEFAULT NULL, authorization_code_expires_at timestamp DEFAULT NULL, authorization_code_metadata blob DEFAULT NULL, access_token_value blob DEFAULT NULL, access_token_issued_at timestamp DEFAULT NULL, access_token_expires_at timestamp DEFAULT NULL, access_token_metadata blob DEFAULT NULL, access_token_type varchar(100) DEFAULT NULL, access_token_scopes varchar(1000) DEFAULT NULL, oidc_id_token_value blob DEFAULT NULL, oidc_id_token_issued_at timestamp DEFAULT NULL, oidc_id_token_expires_at timestamp DEFAULT NULL, oidc_id_token_metadata blob DEFAULT NULL, refresh_token_value blob DEFAULT NULL, refresh_token_issued_at timestamp DEFAULT NULL, refresh_token_expires_at timestamp DEFAULT NULL, refresh_token_metadata blob DEFAULT NULL, user_code_value blob DEFAULT NULL, user_code_issued_at timestamp DEFAULT NULL, user_code_expires_at timestamp DEFAULT NULL, user_code_metadata blob DEFAULT NULL, device_code_value blob DEFAULT NULL, device_code_issued_at timestamp DEFAULT NULL, device_code_expires_at timestamp DEFAULT NULL, device_code_metadata blob DEFAULT NULL, PRIMARY KEY (id) ); |
Nếu các bạn đang sử dụng PostgreSQL database như mình thì cần phải đổi sang kiểu TEXT các bạn nhé! Không thì chạy database migration sẽ bị lỗi.
Khai báo Datasource để chạy database migration như sau:
|
1 2 3 |
spring.datasource.url=jdbc:postgresql://localhost:5432/authorization_server spring.datasource.username=khanh spring.datasource.password=1 |
Giờ thì các bạn có thể định nghĩa RegisteredClient trong database, ví dụ như sau:
|
1 2 3 4 5 6 7 8 9 10 11 12 13 14 15 16 17 |
@Bean public RegisteredClientRepository registeredClientRepository(JdbcTemplate jdbcTemplate) { // @formatter:off RegisteredClient registeredClient = RegisteredClient.withId("e4a295f7-0a5f-4cbc-bcd3-d870243d1b05") .clientId("huongdanjava1") .clientSecret("{noop}123") .clientAuthenticationMethod(ClientAuthenticationMethod.CLIENT_SECRET_POST) .authorizationGrantType(AuthorizationGrantType.CLIENT_CREDENTIALS) .build(); // @formatter:on JdbcRegisteredClientRepository registeredClientRepository = new JdbcRegisteredClientRepository(jdbcTemplate); registeredClientRepository.save(registeredClient); return registeredClientRepository; } |
Ở đây, mình định nghĩa một RegisteredClient với grant type là client_credentials với ID cố định để mỗi khi start app, không có duplicate record trong database. Tuỳ theo nhu cầu thì các bạn hãy viết code tương ứng nhé!
Chúng ta sẽ sử dụng đối tượng JdbcRegisteredClientRepository để lưu thông tin RegisteredClient này. Tham số khi khởi tạo đối tượng JdbcRegisteredClientRepository là JdbcTemplate.
Lúc này, nếu chạy ứng dụng lên các bạn sẽ thấy trong table oauth2_registered_client, một record mới của RegisteredClient mà mình đã khai báo ở trên được insert vào:

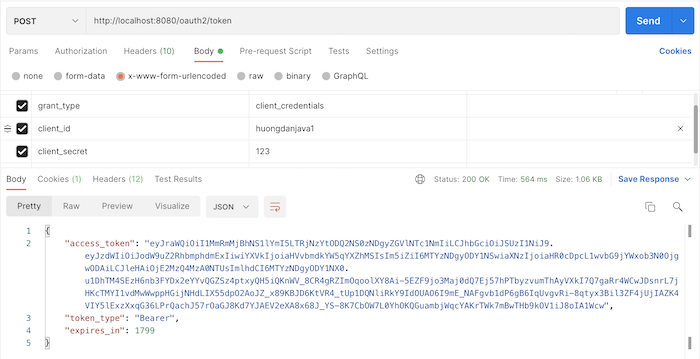
Xong rồi đó các bạn, nếu bây giờ các bạn chạy ứng dụng và lấy token của clientId ở trên, các bạn sẽ thấy kết quả như sau:
