Ngoài sử dụng CXF Component để expose một SOAP Web Service, chúng ta cũng có thể sử dụng APIkit SOAP cùng với một tập tin WSDL để làm điều này trong Mule ESB. Cụ thể như thế nào? Hãy cùng nhau tìm hiểu trong bài viết này nhé các bạn.
Đầu tiên, mình cũng sẽ tạo một Mule Maven project để làm ví dụ:
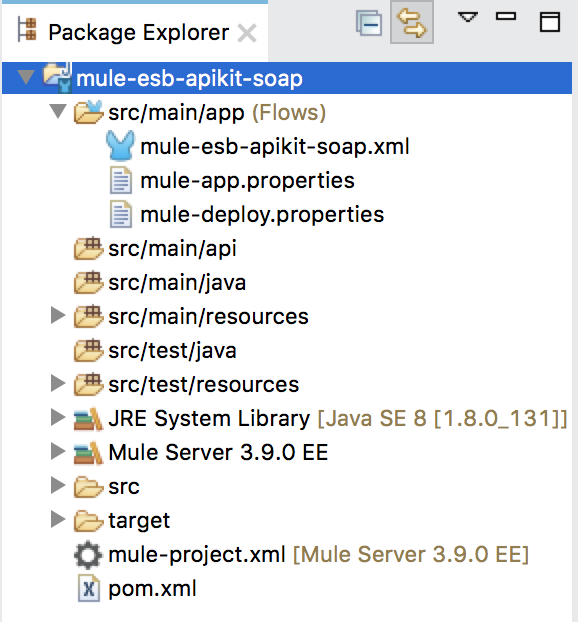
Tập tin WSDL định nghĩa cho SOAP Web Service mình sử dụng trong ví dụ này có nội dung đơn giản như sau:
|
1 2 3 4 5 6 7 8 9 10 11 12 13 14 15 16 17 18 19 20 21 22 23 24 25 26 27 28 29 30 31 32 33 34 35 36 37 38 39 40 41 42 43 44 45 46 47 48 49 50 51 52 53 54 55 56 57 58 59 60 |
<?xml version='1.0' encoding='UTF-8'?><wsdl:definitions xmlns:xsd="http://www.w3.org/2001/XMLSchema" xmlns:wsdl="http://schemas.xmlsoap.org/wsdl/" xmlns:tns="http://muleesbcxfsoapexpose.huongdanjava.com/" xmlns:soap="http://schemas.xmlsoap.org/wsdl/soap/" xmlns:ns1="http://schemas.xmlsoap.org/soap/http" name="HelloWorldServiceService" targetNamespace="http://muleesbcxfsoapexpose.huongdanjava.com/"> <wsdl:types> <xs:schema xmlns:xs="http://www.w3.org/2001/XMLSchema" xmlns:tns="http://muleesbcxfsoapexpose.huongdanjava.com/" attributeFormDefault="unqualified" elementFormDefault="unqualified" targetNamespace="http://muleesbcxfsoapexpose.huongdanjava.com/"> <xs:element name="hello" type="tns:hello"/> <xs:element name="helloResponse" type="tns:helloResponse"/> <xs:complexType name="hello"> <xs:sequence> <xs:element name="name" type="xs:string"/> </xs:sequence> </xs:complexType> <xs:complexType name="helloResponse"> <xs:sequence> <xs:element name="result" type="xs:string"/> </xs:sequence> </xs:complexType> <xs:element name="clientId" nillable="true" type="xs:string"/> </xs:schema> </wsdl:types> <wsdl:message name="helloResponse"> <wsdl:part element="tns:helloResponse" name="result"> </wsdl:part> <wsdl:part element="tns:clientId" name="clientId"> </wsdl:part> </wsdl:message> <wsdl:message name="hello"> <wsdl:part element="tns:hello" name="parameters"> </wsdl:part> <wsdl:part element="tns:clientId" name="clientId"> </wsdl:part> </wsdl:message> <wsdl:portType name="HelloWorldService"> <wsdl:operation name="hello"> <wsdl:input message="tns:hello" name="hello"> </wsdl:input> <wsdl:output message="tns:helloResponse" name="helloResponse"> </wsdl:output> </wsdl:operation> </wsdl:portType> <wsdl:binding name="HelloWorldServiceServiceSoapBinding" type="tns:HelloWorldService"> <soap:binding style="document" transport="http://schemas.xmlsoap.org/soap/http"/> <wsdl:operation name="hello"> <soap:operation soapAction="" style="document"/> <wsdl:input name="hello"> <soap:header message="tns:hello" part="clientId" use="literal"> </soap:header> <soap:body parts="parameters" use="literal"/> </wsdl:input> <wsdl:output name="helloResponse"> <soap:header message="tns:helloResponse" part="clientId" use="literal"> </soap:header> <soap:body parts="result" use="literal"/> </wsdl:output> </wsdl:operation> </wsdl:binding> <wsdl:service name="HelloWorldServiceService"> <wsdl:port binding="tns:HelloWorldServiceServiceSoapBinding" name="HelloWorldServicePort"> <soap:address location="http://localhost:8081/hello"/> </wsdl:port> </wsdl:service> </wsdl:definitions> |
WSDL này định nghĩa một SOAP Web Service với một operation tên là “hello” cho phép người dùng có thể gửi một SOAP message chứa tên của một người nào đó trong phần <Body> (ví dụ tên mình Khanh đi). Phần <Header> của request message sẽ chứa thông tin clientId của device gửi message. Implementation cho phần response, cái mà chúng ta sẽ sử dụng APIkit SOAP của Mule ESB để làm, thì là do chúng ta nha các bạn. Mình sẽ build để response lại message “Hello, Khanh” cho đơn giản.
Mình sẽ bỏ tập tin này vào thư mục /src/main/wsdl của project.
Thật ra thư mục /src/main/wsdl này đã có sẵn khi chúng ta tạo mới Mule Maven project nhưng mặc định nó không được include là resource folder của project nên các bạn không thấy. Các bạn có thể sử dụng plugin Builder Helper Maven Plugin đang được khai báo trong tập tin pom.xml của project này để include thư mục wsdl là một resource folder như sau:
|
1 2 3 4 5 6 7 8 9 10 11 12 13 14 15 16 17 18 19 20 21 22 23 24 25 26 27 28 29 30 |
<plugin> <groupId>org.codehaus.mojo</groupId> <artifactId>build-helper-maven-plugin</artifactId> <version>1.7</version> <executions> <execution> <id>add-resource</id> <phase>generate-resources</phase> <goals> <goal>add-resource</goal> </goals> <configuration> <resources> <resource> <directory>src/main/app/</directory> </resource> <resource> <directory>src/main/api/</directory> </resource> <resource> <directory>mappings/</directory> </resource> <resource> <directory>src/main/wsdl/</directory> </resource> </resources> </configuration> </execution> </executions> </plugin> |
Khi đó các bạn sẽ thấy thư mục wsdl được include như là resource folder của project.
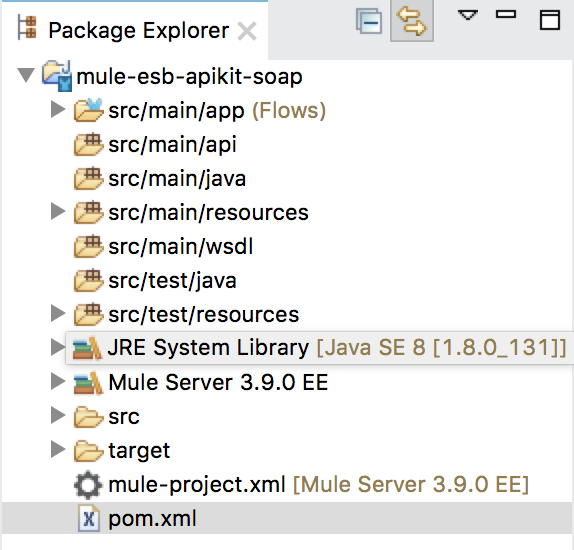
Hãy bỏ tập tin wsdl của chúng ta vào thư mục này nhé các bạn.
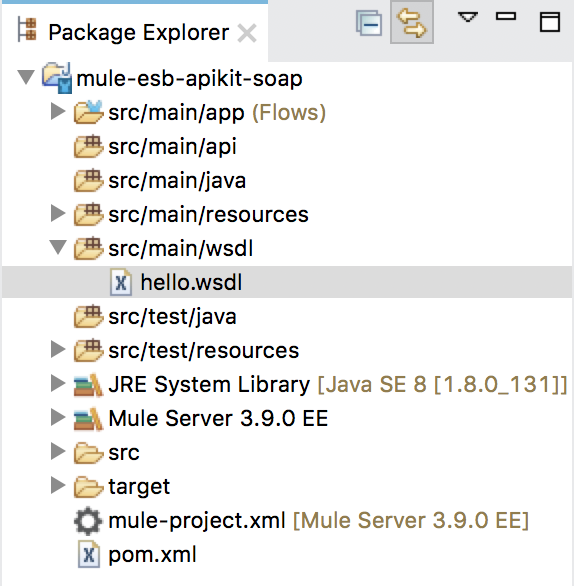
OK, giờ chúng ta đi vào chủ đề chính của bài viết này nhé các bạn.
Để sử dụng APIkit SOAP trong Mule ESB, đầu tiên chúng ta cần phải khai báo dependency của nó. Có 3 dependencies chúng ta cần khai báo cho APIkit SOAP như sau:
|
1 2 3 4 5 6 7 8 9 10 11 12 13 14 15 |
<dependency> <groupId>org.mule.modules</groupId> <artifactId>mule-module-apikit-soap</artifactId> <version>1.0.3</version> </dependency> <dependency> <groupId>org.mule.modules</groupId> <artifactId>mule-module-apikit-soap-common</artifactId> <version>1.0.3</version> </dependency> <dependency> <groupId>org.mule.modules</groupId> <artifactId>mule-module-apikit-soap-metadata</artifactId> <version>1.0.3</version> </dependency> |
Hiện tại thì mình không tìm thấy Maven repository chứa 3 dependencies này trên mạng, nên chỉ có cách các bạn vào thư mục plugins của Anypoint Studio rồi tìm thư mục org.mule.tooling.soapkit.contribution_1.1.4/lib
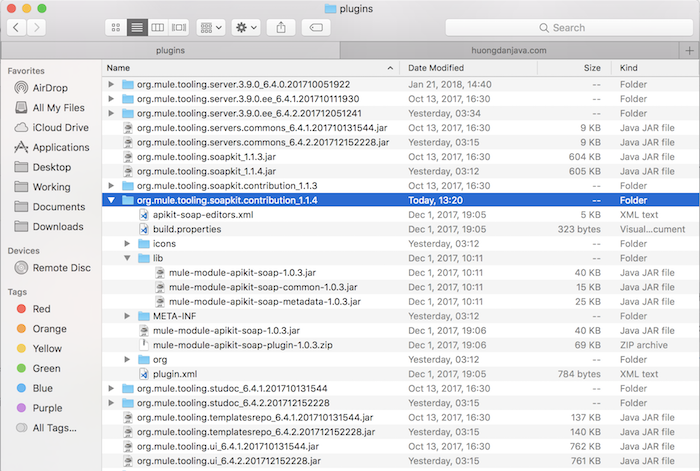
để lấy những tập tin này sau đó install vào Local Maven repository. Các bạn có thể xem hướng dẫn install dependency vào Local Maven repository tại đây.
OK, sau khi đã thêm dependencies xong, các bạn hãy click chuột phải lên tập tin hello.wsdl trong project ví dụ rồi chọn Mule, xong chọn Generate Flows from WSDL
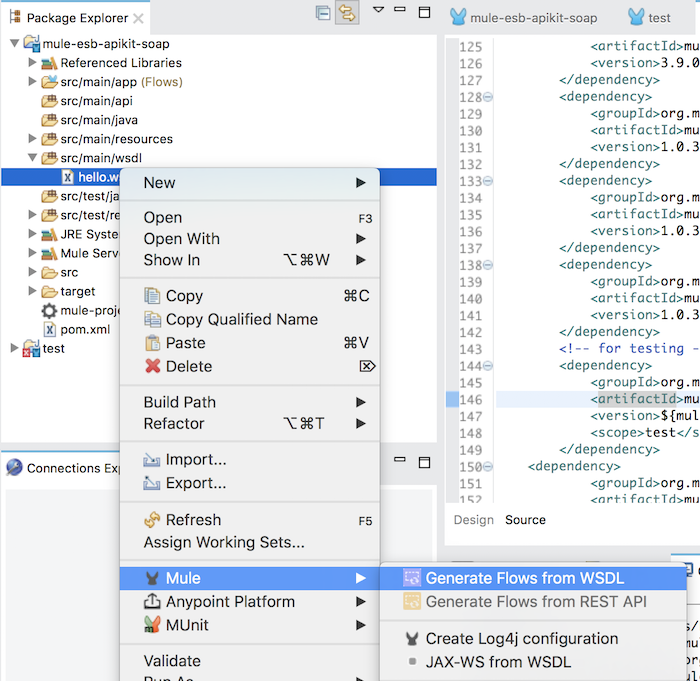
Lúc này, một cửa sổ sẽ hiện ra:
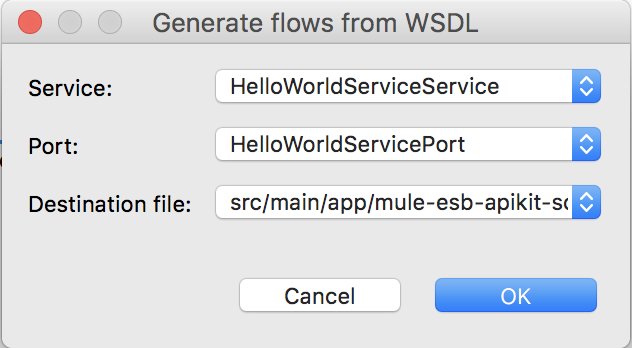
giúp chúng ta chọn tập tin Mule Configuration để generate Mule Flows.
Các bạn có thể để mặc định rồi nhấn nút OK.
Khi đó, các bạn sẽ thấy Mule Flows được generate như sau:
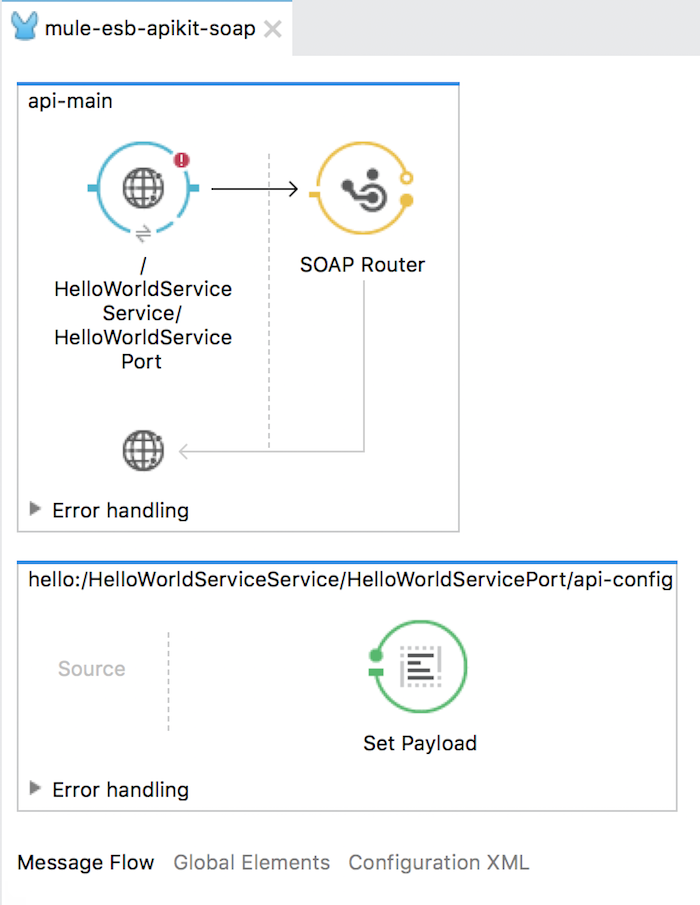
Như các bạn thấy, Anypoint Studio đã generate Mule Flows sử dụng APIkit SOAP với một api-main Mule flow sẽ tiếp nhận request từ client, mỗi operation của SOAP Web Service sẽ được generate thành một Mule Flow. Nhiệm vụ của chúng ta chỉ cần implement Mule flow cho từng operation là xong.
Mặc định, Mule flow cho mỗi operation chỉ có một endpoint Set Payload. Nội dung của endpoint Set Payload này tuỳ thuộc vào operation của SOAP Web Service sẽ có nội dung khác nhau. Trong ví dụ này của mình, nội dung của endpoint Set Payload như sau:
|
1 2 3 4 |
<soap:Fault xmlns:soap="http://www.w3.org/2003/05/soap-envelope"> <faultcode>soap:Server</faultcode> <faultstring>Operation [hello:/HelloWorldServiceService/HelloWorldServicePort/api-config] not implemented</faultstring> </soap:Fault> |
Các bạn có thể remove endpoint Set Payload này để implement Mule flow này theo cách của mình nhưng phải tuân thủ định nghĩa của tập tin WSDL nha các bạn.
Ở đây, mình sẽ xoá endpoint Set Payload này và thêm Transform Message Component để build SOAP response message return về cho client với nội dung như sau:
|
1 2 3 4 5 6 7 8 9 10 11 12 |
%dw 1.0 %output application/xml %namespace ns0 http://muleesbcxfsoapexpose.huongdanjava.com/ --- { ns0#helloResponse: { return: "Hello, " ++ payload.ns0#hello.name } } |
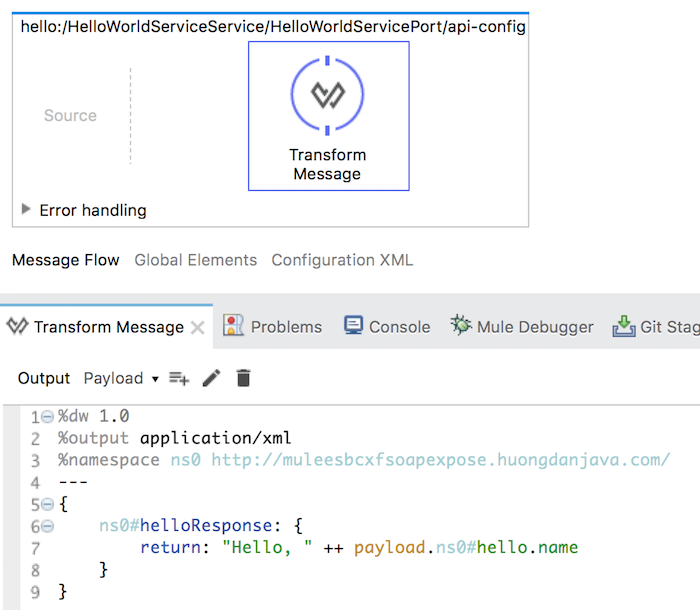
Tương tự như Web Service Consumer connector, phần Payload của Mule Message sẽ tự động convert thành phần <Body> của SOAP response message.
Để build phần <Header> cho response, chúng ta cần phải làm thêm một bước nữa, đó chính là xây dựng một Mule Message Property với tên gọi bắt đầu với “soap.”.
Để làm được điều này, trong cửa sổ của Transform Message, bên cạnh phần Output của Payload, các bạn hãy nhấn vào nút thêm mới Target:
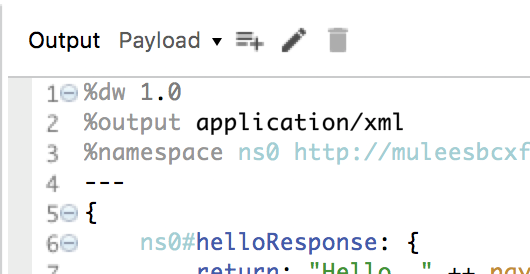
Một cửa sổ mới sẽ hiện lên:
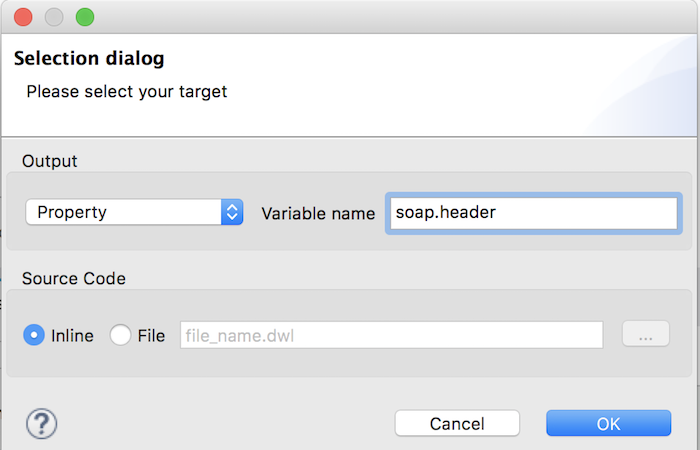
Các bạn hãy chọn phần Output và điền Variable name như trên.
Nhấn nút OK để bắt đầu build Mule Message Property “soap.header” các bạn nhé:
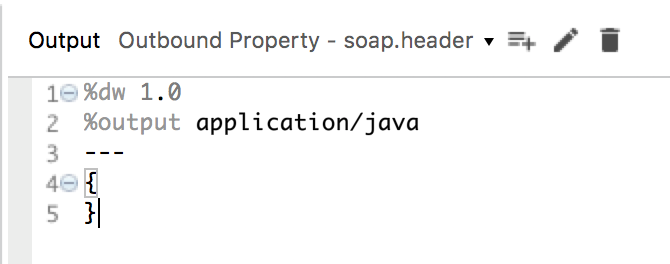
Nội dung DataWeave của phần Message Property “soap.header” sẽ như sau:
|
1 2 3 4 5 6 7 8 9 10 |
%dw 1.0 %output application/xml %namespace ns0 http://muleesbcxfsoapexpose.huongdanjava.com/ --- { ns0#clientId : inboundProperties."soap.clientId".ns0#clientId } |
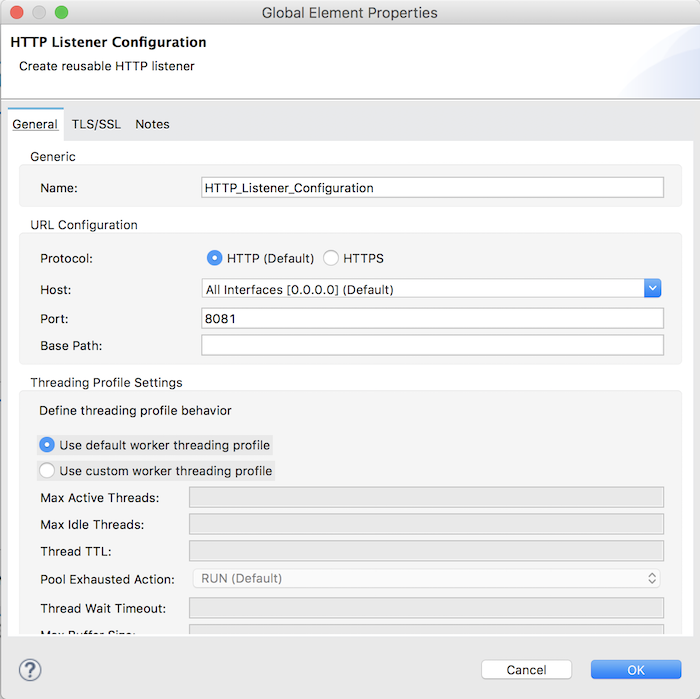
Hiện tại bạn cũng sẽ thấy enpoint HTTP Listener Connector bị lỗi. Nguyên nhân là vì sau khi generate từ tập tin WSDL, Global Configuration của Connector này chưa được tạo. Các bạn hãy cấu hình cho nó nhé, có thể xem thêm ở đây.
Ở đây, mình cấu hình Global Configuration cho HTTP Listener Connector như sau:
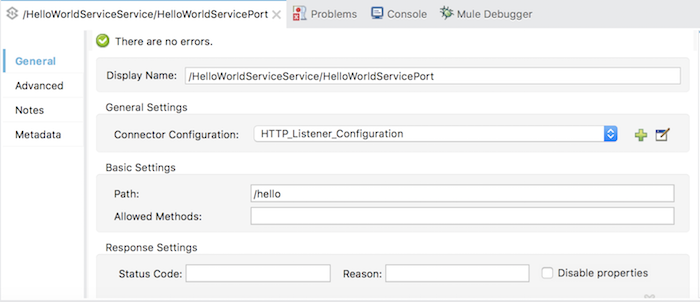
Thay đổi cấu hình của HTTP Listener Connector cho đúng với định nghĩa của tập tin WSDL:
Đến đây là chúng ta đã hoàn thành một ví dụ đơn giản sử dụng APIkit SOAP để expose SOAP Web Service, nhưng để chạy được các bạn cần làm thêm một bước nữa để đưa thư viện APIkit SOAP vào ứng dụng của chúng ta khi chạy với Mule Runtime. Nếu không làm bước này, các bạn sẽ gặp lỗi liên quan đến tập tin mule-apikit-soap.xsd của APIkit SOAP. Với bước cuối cùng này, các bạn cần mở tập tin pom.xml rồi tìm plugin mule-app–maven–plugin để include các thư viện của APIkit SOAP như sau:
|
1 2 3 4 5 6 7 8 9 10 11 12 13 14 15 16 17 18 19 20 21 22 23 |
<plugin> <groupId>org.mule.tools.maven</groupId> <artifactId>mule-app-maven-plugin</artifactId> <version>${mule.tools.version}</version> <extensions>true</extensions> <configuration> <copyToAppsDirectory>true</copyToAppsDirectory> <inclusions> <inclusion> <groupId>org.mule.modules</groupId> <artifactId>mule-module-apikit-soap</artifactId> </inclusion> <inclusion> <groupId>org.mule.modules</groupId> <artifactId>mule-module-apikit-soap-common</artifactId> </inclusion> <inclusion> <groupId>org.mule.modules</groupId> <artifactId>mule-module-apikit-soap-metadata</artifactId> </inclusion> </inclusions> </configuration> </plugin> |
OK hết rồi đó các bạn, giờ chạy thôi.
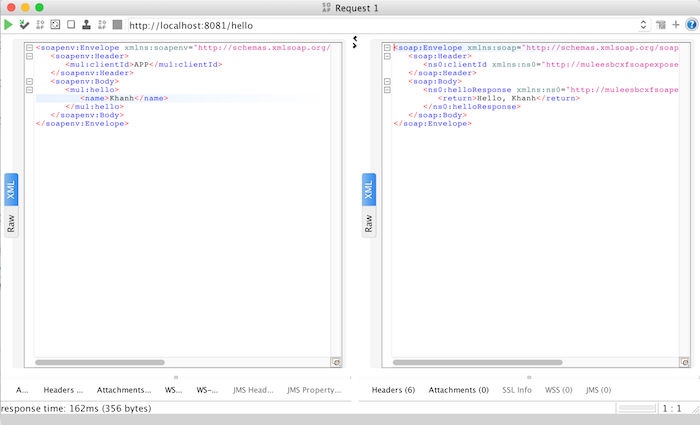
Kết quả khi chạy với SOAPUI:
