Mình đã giới thiệu với các bạn về Spring Data R2DBC. Với Spring Boot thì việc cấu hình và sử dụng Spring Data R2DBC đơn giản và thuận tiện hơn rất nhiều. Cụ thể như thế nào? Chúng ta hãy cùng nhau tìm hiểu trong bài viết này các bạn nhé!
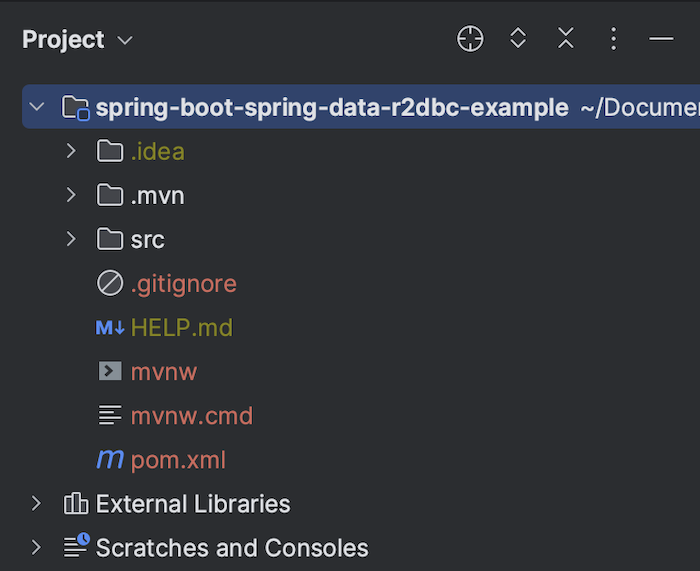
Đầu tiên, mình sẽ tạo một Spring Boot project với Spring Data R2DBC Starter và PostgreSQL dependencies để làm ví dụ.
Kết quả như sau:

Với Spring Boot thì để cấu hình cho đối tượng ConnectionFactory, các bạn chỉ cần sử dụng một số properties bắt đầu với “spring.r2dbc” như sau:
|
1 2 3 |
spring.r2dbc.url=r2dbc:postgresql://localhost:5432/spring_data_r2dbc_example spring.r2dbc.username=khanh spring.r2dbc.password=1 |
Các bạn cũng có thể cấu hình connection pool sử dụng các properties sau:
|
1 2 3 |
spring.r2dbc.pool.enabled=true spring.r2dbc.pool.initial-size=3 spring.r2dbc.pool.max-size=10 |
Rất đơn giản phải không các bạn?
Đối với các class Repository, thì các bạn cũng định nghĩa như bình thường.
Ví dụ, mình cũng có table “student”:
|
1 2 3 4 5 |
CREATE TABLE student ( id INT NOT NULL, name VARCHAR(50) DEFAULT NULL, PRIMARY KEY (id) ) |
với nội dung như sau trong PostgreSQL database:

Class model cho table “student”, mình sẽ định nghĩa như sau:
|
1 2 3 4 5 6 7 8 9 10 11 12 13 14 15 16 17 18 19 20 21 22 23 24 25 26 27 28 29 30 31 |
package com.huongdanjava.springdatar2dbc; import org.springframework.data.annotation.Id; import org.springframework.data.relational.core.mapping.Table; @Table public class Student { private static final long serialVersionUID = 1L; @Id private Long id; private String name; public Long getId() { return id; } public void setId(Long id) { this.id = id; } public String getName() { return name; } public void setName(String name) { this.name = name; } } |
Repository class cho model Student như sau:
|
1 2 3 4 5 6 7 8 9 |
package com.huongdanjava.springboot; import org.springframework.data.r2dbc.repository.R2dbcRepository; import org.springframework.stereotype.Repository; @Repository public interface StudentRepository extends R2dbcRepository<Student, Long> { } |
Đến đây thì chúng ta đã cấu hình xong Spring Data R2DBC với Spring Boot trong ứng dụng của mình rồi đó các bạn!
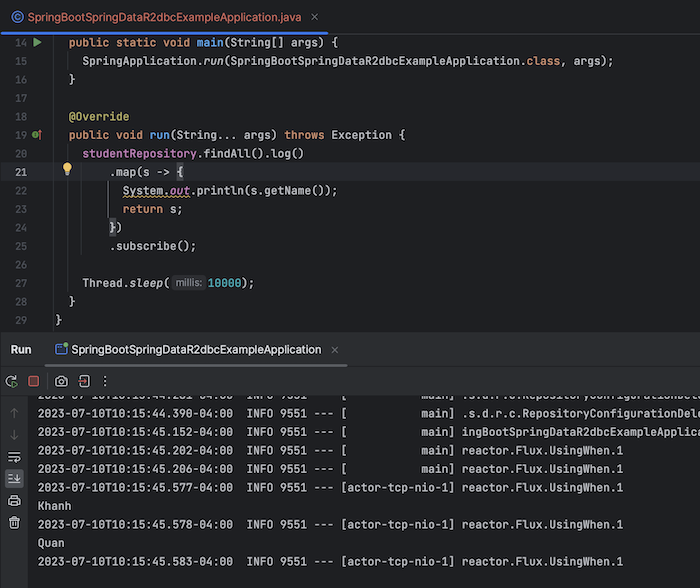
Bây giờ, nếu mình chạy Spring Boot với Java console với nội dung như sau:
|
1 2 3 4 5 6 7 8 9 10 11 12 13 14 15 16 17 18 19 20 21 22 23 24 25 26 27 28 29 |
package com.huongdanjava.springboot; import org.springframework.beans.factory.annotation.Autowired; import org.springframework.boot.CommandLineRunner; import org.springframework.boot.SpringApplication; import org.springframework.boot.autoconfigure.SpringBootApplication; @SpringBootApplication public class SpringBootSpringDataR2dbcExampleApplication implements CommandLineRunner { @Autowired StudentRepository studentRepository; public static void main(String[] args) { SpringApplication.run(SpringBootSpringDataR2dbcExampleApplication.class, args); } @Override public void run(String... args) throws Exception { studentRepository.findAll().log() .map(s -> { System.out.println(s.getName()); return s; }) .subscribe(); Thread.sleep(10000); } } |
kết quả sẽ như sau:


