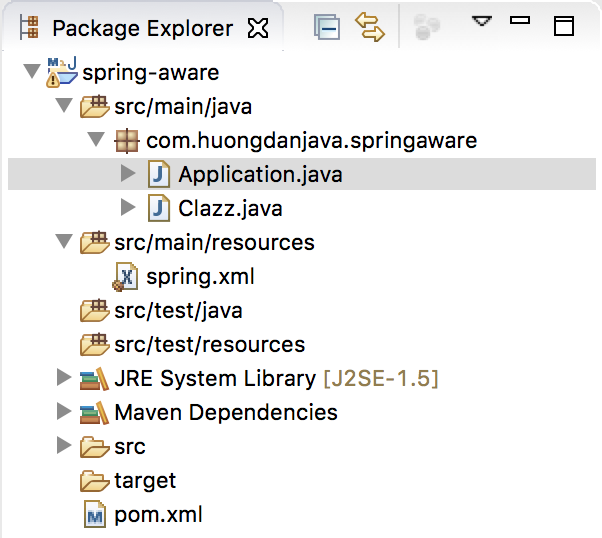
Chúng ta đã biết cách làm thế nào để lấy một đối tượng từ Spring container bằng phương thức getBean() nhưng đôi khi chúng ta lại có nhu cầu ngược lại. Nghĩa là chúng ta muốn sử dụng Spring container trong đối tượng của mình để có thể truy cập vào các đối tượng khác trong container của nó. Vậy có cách nào để làm điều đó không?
Xin nói với các bạn rằng, Spring cũng hỗ trợ chúng ta làm điều đó. Bằng cách hiện thực interface ApplicationContextAware, đối tượng của chúng ta sẽ sử dụng được Spring container.
Hãy thử làm một ví dụ để xem nó như thế nào nhé!

Trong ví dụ này mình có một ứng dụng quản lý các lớp học.
|
1 2 3 4 5 6 7 8 9 10 11 12 13 14 15 |
package com.huongdanjava.springaware; public class Clazz { private String name; public String getName() { return name; } public void setName(String name) { this.name = name; } } |
Ở đây mình sẽ khai báo hai lớp học trong Spring container. Bean id của mỗi lớp học chính là tên của lớp học đó. Như bên dưới:
|
1 2 3 4 5 6 7 8 9 10 11 |
<beans xmlns="http://www.springframework.org/schema/beans" xmlns:xsi="http://www.w3.org/2001/XMLSchema-instance" xsi:schemaLocation="http://www.springframework.org/schema/beans http://www.springframework.org/schema/beans/spring-beans.xsd"> <bean id="clazzA" class="com.huongdanjava.springaware.Clazz"> </bean> <bean id="clazzB" class="com.huongdanjava.springaware.Clazz"> </bean> </beans> |
Giờ mình có nhu cầu từ lớp học A mình cần biết tên của lớp học B trong Spring container. Để làm được điều này mình cần phải truy cập vào được Spring container từ lớp học A trước. Hãy thêm code hiện thực interface ApplicationContextAware như bên dưới nhé các bạn:
|
1 2 3 4 5 6 7 8 9 10 11 12 13 14 15 16 17 18 19 20 21 22 23 24 25 26 27 28 |
package com.huongdanjava.springaware; import org.springframework.beans.BeansException; import org.springframework.context.ApplicationContext; import org.springframework.context.ApplicationContextAware; public class Clazz implements ApplicationContextAware { private String name; private ApplicationContext context; public String getName() { return name; } public void setName(String name) { this.name = name; } public void setApplicationContext(ApplicationContext context) throws BeansException { this.context = context; } public ApplicationContext getContext() { return context; } } |
OK, bây giờ từ lớp A chúng ta có thể lấy được đối tượng của lớp B rồi đấy các bạn:
|
1 2 3 4 5 6 7 8 9 10 11 12 13 14 15 16 |
package com.huongdanjava.springaware; import org.springframework.context.ApplicationContext; import org.springframework.context.support.ClassPathXmlApplicationContext; public class Application { public static void main(String[] args) { ApplicationContext context = new ClassPathXmlApplicationContext("spring.xml"); Clazz clazzA = (Clazz) context.getBean("clazzA"); Object clazzB = clazzA.getContext().getBean("clazzB"); } } |
Đến đây chắc có lẽ một số bạn sẽ thắc mắc tại sao chỉ cần hiện thực interface ApplicationContextAware thì đối tượng lớp A có thể gọi được Spring container. Mình xin trả lời là Spring sử dụng đoạn code sau để tự động đưa Spring container vào đối tượng cần.
|
1 2 3 4 5 |
Class<?> beanClass = beanDefinition.getClass(); Object bean = beanClass.newInstance(); if (bean instanceof ApplicationContextAware) { ((ApplicationContextAware) bean).setApplicationContext(ctx); } |
Các bạn thấy đó, bất kỳ đối tượng nào là thể hiện của interface ApplicationContextAware thì trong quá trình runtime, đối tượng đó sẽ được tự động gán Spring container vào, ở đây là ApplicationContext.
Bây giờ trở lại với nhu cầu của chúng ta là lấy tên của lớp B nhé các bạn.
Để có thể dùng bean id làm tên của đối tượng lớp B, chúng ta cần hiện thực interface BeanNameAware cho đối tượng này. Code sẽ như sau nhé các bạn:
|
1 2 3 4 5 6 7 8 9 10 11 12 13 14 15 16 17 18 19 20 21 22 23 24 25 26 27 28 29 30 31 32 33 |
package com.huongdanjava.springaware; import org.springframework.beans.BeansException; import org.springframework.beans.factory.BeanNameAware; import org.springframework.context.ApplicationContext; import org.springframework.context.ApplicationContextAware; public class Clazz implements ApplicationContextAware, BeanNameAware { private String name; private ApplicationContext context; public String getName() { return name; } public void setName(String name) { this.name = name; } public void setApplicationContext(ApplicationContext context) throws BeansException { this.context = context; } public ApplicationContext getContext() { return context; } public void setBeanName(String name) { this.name = name; } } |
Khi đó, để lấy tên của lớp B, chúng ta chỉ cần làm như sau:
|
1 2 3 4 5 6 7 8 9 10 11 12 13 14 15 16 17 18 |
package com.huongdanjava.springaware; import org.springframework.context.ApplicationContext; import org.springframework.context.support.ClassPathXmlApplicationContext; public class Application { public static void main(String[] args) { ApplicationContext context = new ClassPathXmlApplicationContext("spring.xml"); Clazz clazzA = (Clazz) context.getBean("clazzA"); Clazz clazzB = (Clazz) clazzA.getContext().getBean("clazzB"); System.out.println("\n" + clazzB.getName()); } } |
Kết quả:


Hằng
Cảm ơn bạn. Viết rất dễ hiểu