Xem toàn bộ series bài viết hướng dẫn xây dựng ứng dụng Questions Management tại đây.
Sau khi đã xây dựng giao diện cho phần thêm mới question, giờ là lúc chúng ta đi vào thực hiện các chức năng của phần thêm mới question này các bạn nhé.
Đầu tiên, mình sẽ thêm vào class QuestionsService một phương thức cho phép chúng ta có thể gọi tới API thêm mới một question của API Question Service để truyền thông tin về question mà chúng ta cần thêm mới.
Cụ thể method này như sau:
|
1 2 3 |
addQuestion(question: Question): Promise<CompositeQuestion> { return this.http.post<CompositeQuestion>("/question/add", JSON.stringify(question), { headers: this.headers }).toPromise(); } |
Bởi vì mình muốn sau khi thêm mới question thành công, ứng dụng của chúng ta sẽ redirect tới trang thông tin chi tiết của một question nên trong phương thức trên, mình đã lấy kết quả trả về từ API Question Service.
Tiếp theo chúng ta sẽ sửa lại form thêm mới question trong tập tin new_question.component.html cho phép chúng ta có thể hiển thị thông tin tất cả các category có trong hệ thống:
|
1 2 3 4 5 6 7 8 9 10 11 12 13 14 15 |
<form role="form"> <div class="form-group"> <label>Description</label> <textarea class="form-control" rows="3"></textarea> <p class="help-block">The description of the question.</p> </div> <div class="form-group"> <label>Category</label> <select class="form-control"> <option *ngFor="let c of categories" [ngValue]="c"> {{ c.name }} </option> </select> <p class="help-block">The category which this question belong to.</p> </div> <button type="submit" class="btn btn-primary">Add New Question</button> </form> |
với biến categories được khai báo trong class NewQuestionComponent như sau:
|
1 |
categories: Category[]; |
Giá trị của biến categories sẽ được lấy từ API Category Service sử dụng API lấy tất cả category của service này như sau:
|
1 2 3 4 5 6 7 8 9 10 11 12 13 14 15 16 17 18 19 20 21 22 |
import { AfterViewInit, Component } from "../../../../node_modules/@angular/core"; import { CategoriesService, Category } from "../../services/categories.service"; @Component({ selector: 'qm-body', templateUrl: './new_question.component.html' }) export class NewQuestionComponent implements AfterViewInit { categories: Category[]; selectedCategory: Category; constructor(private categoriesService: CategoriesService) { } ngAfterViewInit(): void { this.categoriesService.findAllCategories().then(r => { this.categories = r; }); } } |
Bây giờ chúng ta sẽ đi vào phần thực hiện chức năng thêm mới question.
Trong form thêm mới question, chúng ta sẽ khai báo những biến lưu giữ giá trị của description và category mà người dùng nhập vào bằng cách sử dụng directive ngModel của Angular như sau:
|
1 2 3 4 5 6 7 8 9 10 11 12 13 14 15 |
<form role="form"> <div class="form-group"> <label>Description</label> <textarea class="form-control" rows="3" [(ngModel)]="description" name="description"></textarea> <p class="help-block">The description of the question.</p> </div> <div class="form-group"> <label>Category</label> <select [(ngModel)]="selectedCategory" class="form-control" name="category"> <option *ngFor="let c of categories" [ngValue]="c"> {{ c.name }} </option> </select> <p class="help-block">The category which this question belong to.</p> </div> <button type="submit" class="btn btn-primary" (click)="createNewQuestion()">Add New Question</button> </form> |
Như các bạn thấy, mình cũng đã sửa lại nội dung của button “Add New Question” cho phép khi người dùng khi click vào button này thì ứng dụng của chúng ta sẽ gọi đến method createNewQuestion() trong class NewQuestionComponent để thực hiện việc thêm mới question.
Nội dung của class NewQuestionComponent sẽ được sửa lại như sau:
|
1 2 3 4 5 6 7 8 9 10 11 12 13 14 15 16 17 18 19 20 21 22 23 24 25 26 27 28 29 30 31 32 33 34 35 36 37 38 39 40 41 42 43 44 45 46 47 48 49 50 51 52 53 54 55 56 57 58 59 60 61 62 |
import { AfterViewInit, Component } from "../../../../node_modules/@angular/core"; import { QuestionsService, Question } from "../../services/questions.service"; import { CategoriesService, Category } from "../../services/categories.service"; import { Router } from "@angular/router"; @Component({ selector: 'qm-body', templateUrl: './new_question.component.html' }) export class NewQuestionComponent implements AfterViewInit { categories: Category[]; selectedCategory: Category; newQuestion: Question; description: string; constructor(private questionsService: QuestionsService, private categoriesService: CategoriesService, private router: Router) { } createNewQuestion() { if (this.isEmpty(this.description)) { alert("Description cannot be empty."); return; } if (this.isEmpty(this.selectedCategory)) { alert("Please select a category."); return; } this.newQuestion = new Question(); this.newQuestion.description = this.description; this.newQuestion.categoryId = this.selectedCategory.id; this.questionsService.addQuestion(this.newQuestion) .then(q => { alert("Success"); this.router.navigate(['/question/' + q.id]); }) .catch(this.handleError); } isEmpty(val) { return val === undefined || val == null || val.length <= 0; } private handleError(error: any): Promise<any> { alert('An error occurred' + error); return Promise.reject(error.message || error); } ngAfterViewInit(): void { this.categoriesService.findAllCategories().then(r => { this.categories = r; }); } } |
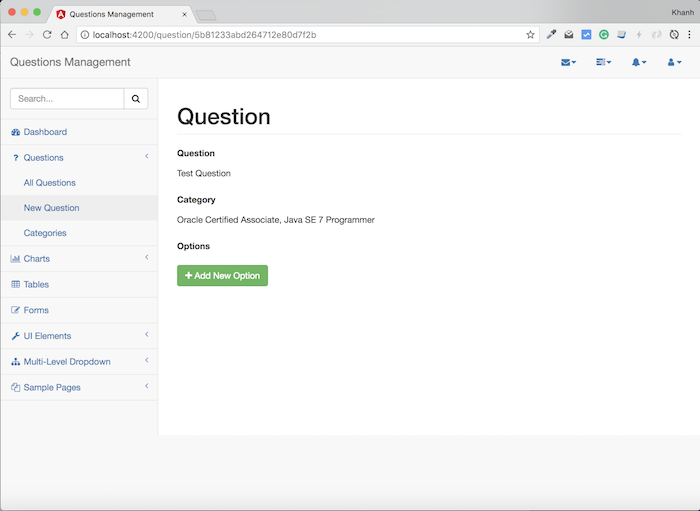
Như mình đã nói ở trên, sau khi thêm mới thành công question, ứng dụng của chúng ta sẽ redirect tới trang thông tin của question nên trong class NewQuestionComponent trên, mình đã khai báo class Router và sử dụng phương thức navigate() của class này để redirect tới URL “/question/{id}” sau khi nhận response thành công từ API Question Service.
OK, vậy là chúng ta đã hiện thực xong phần thêm mới question trong phần Frontend của ứng dụng Questions Management rồi đó các bạn. Thử test xem sao nhé!
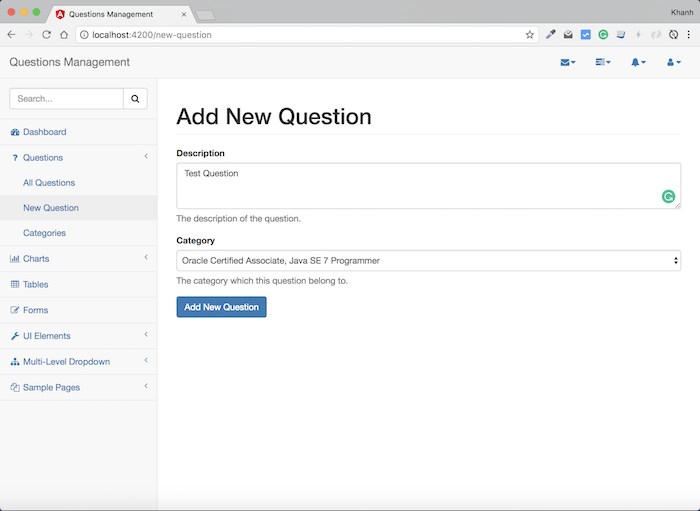
Trong trang “New Question”, sau khi nhập thông tin về question cần thêm mới:

và nhấn nút “Add New Question”, ứng dụng của chúng ta sẽ tự redirect tới trang thông tin của question này như sau:

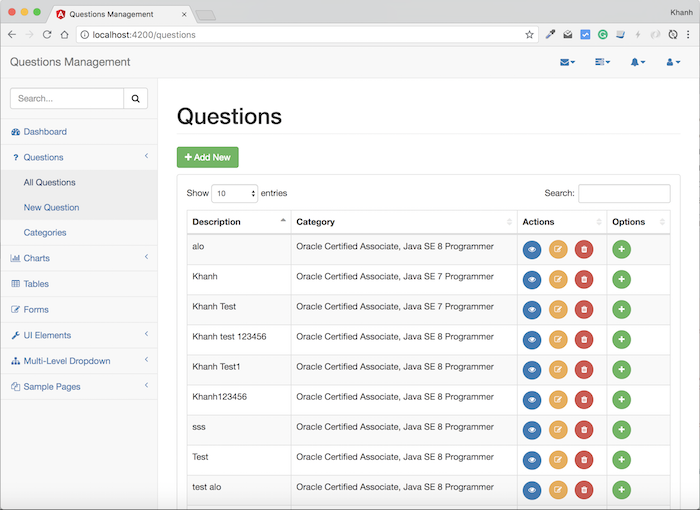
Có một phần nữa là trong trang “All Questions”, chúng ta cũng có button “Add New”:

để chúng ta gọi đến trang thêm mới question, nên mình sẽ sửa lại code của button này như sau:
|
1 |
<a class="btn btn-success" routerLink="/new-question"><i class="fa fa-plus"></i> Add New</a> <p></p> |
Bây giờ thì các bạn có thể từ trang “All Questions” gọi tới trang thêm mới question rồi.


